使用 32001409 和 STM32L496AG 体验无缝通信的新时代
使用 915MHz 拓展视野:连接的新时代
已发布 7月 22, 2025
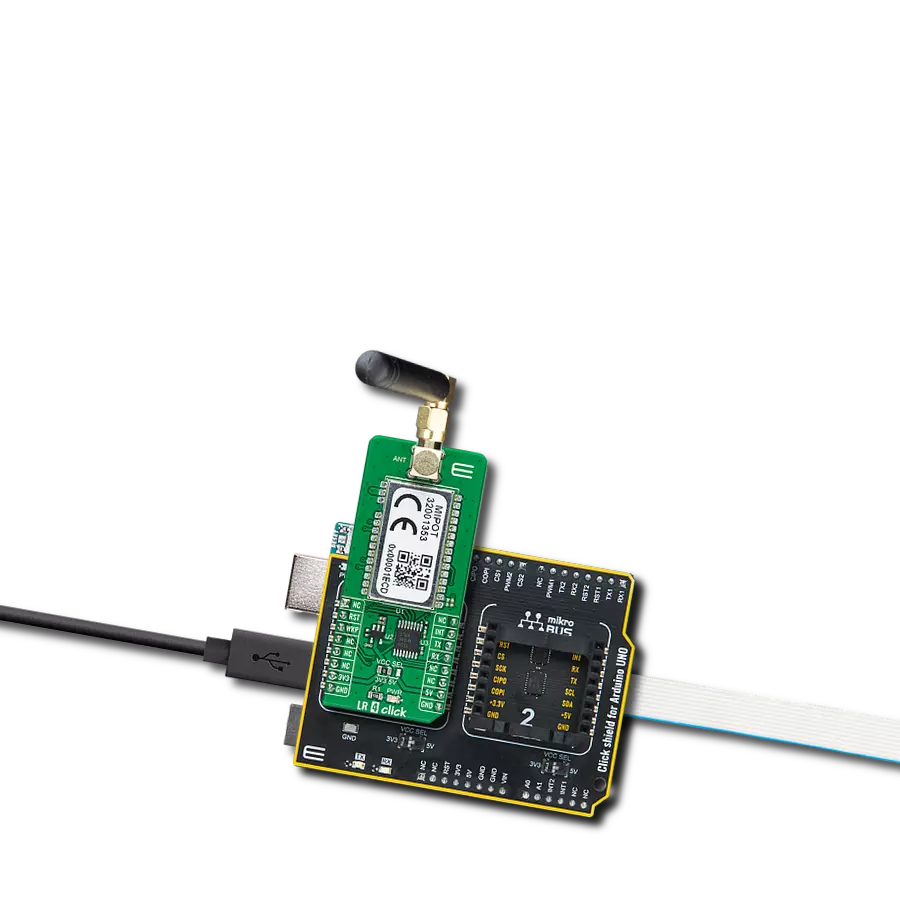
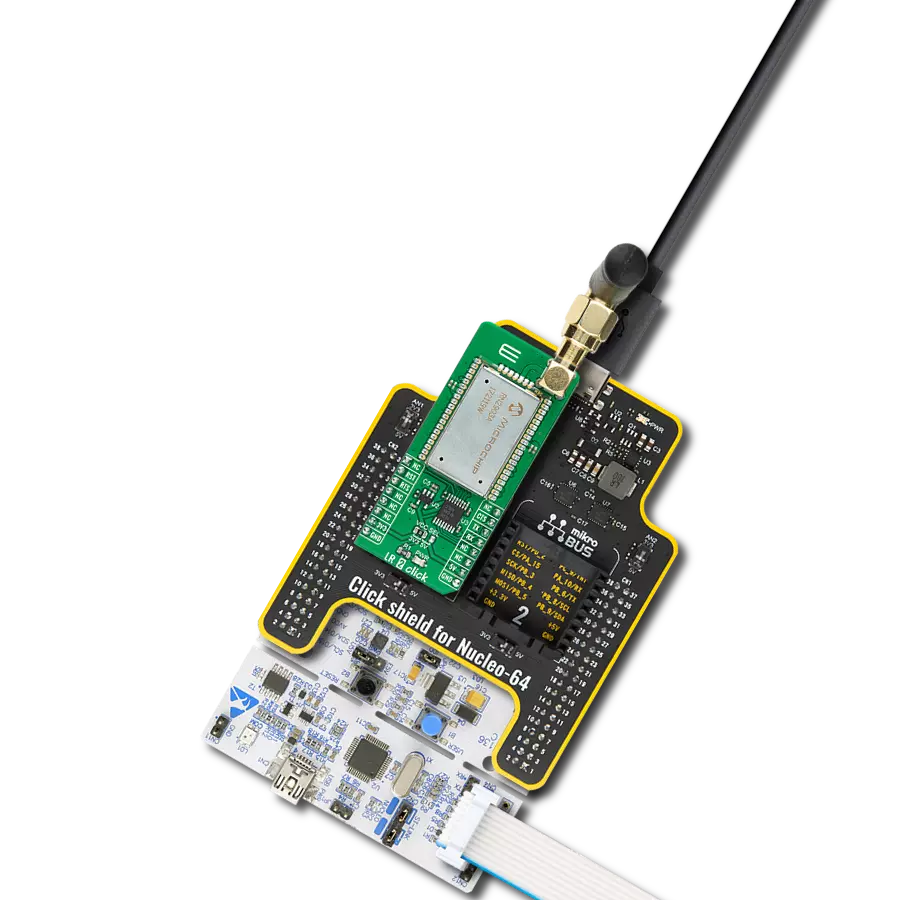
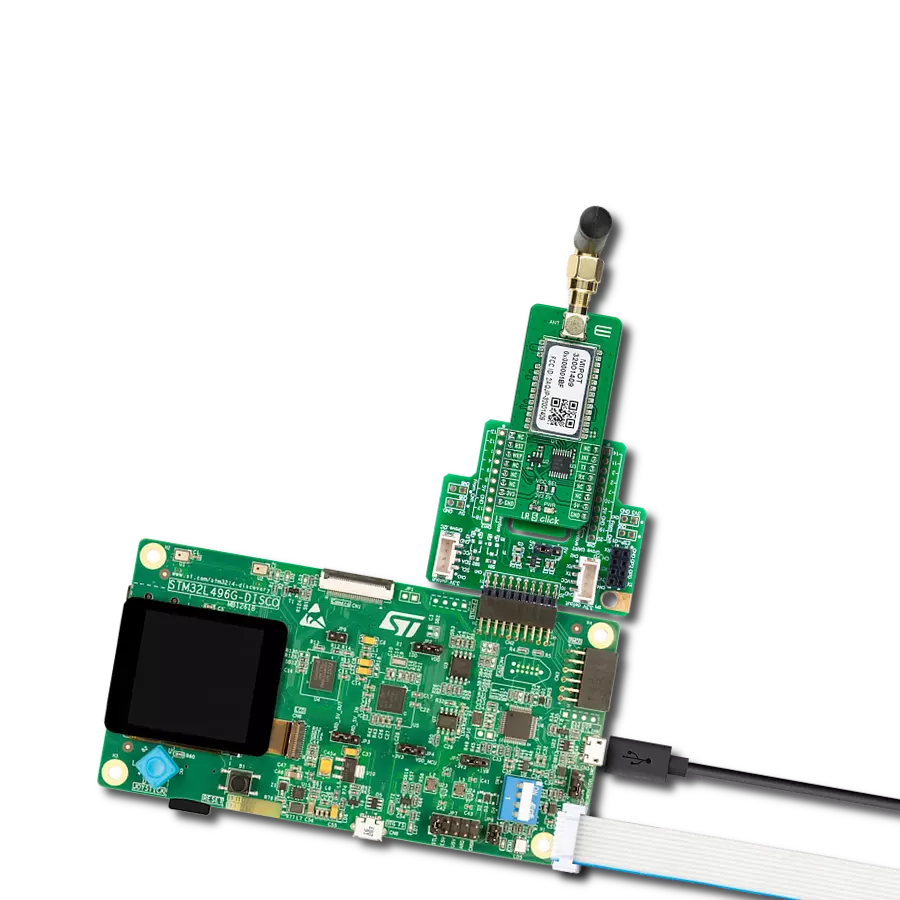
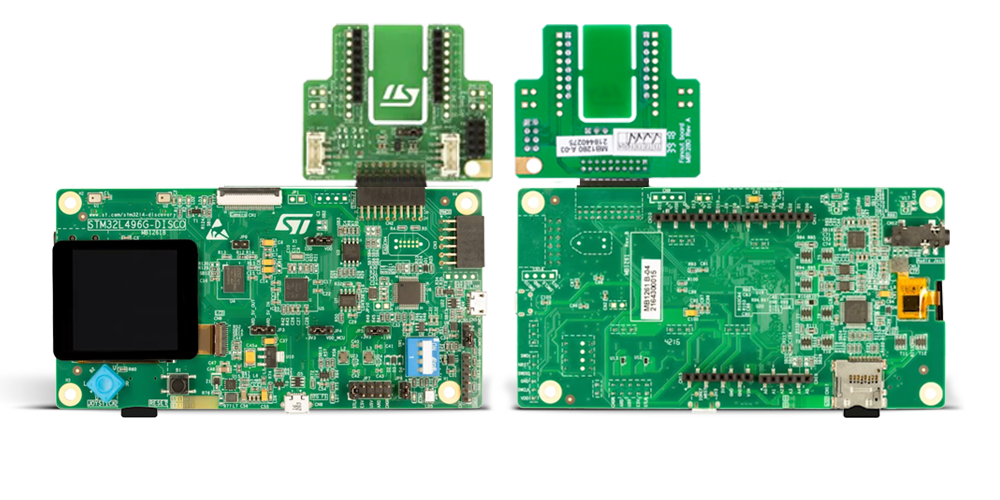
点击板
LR 5 Click
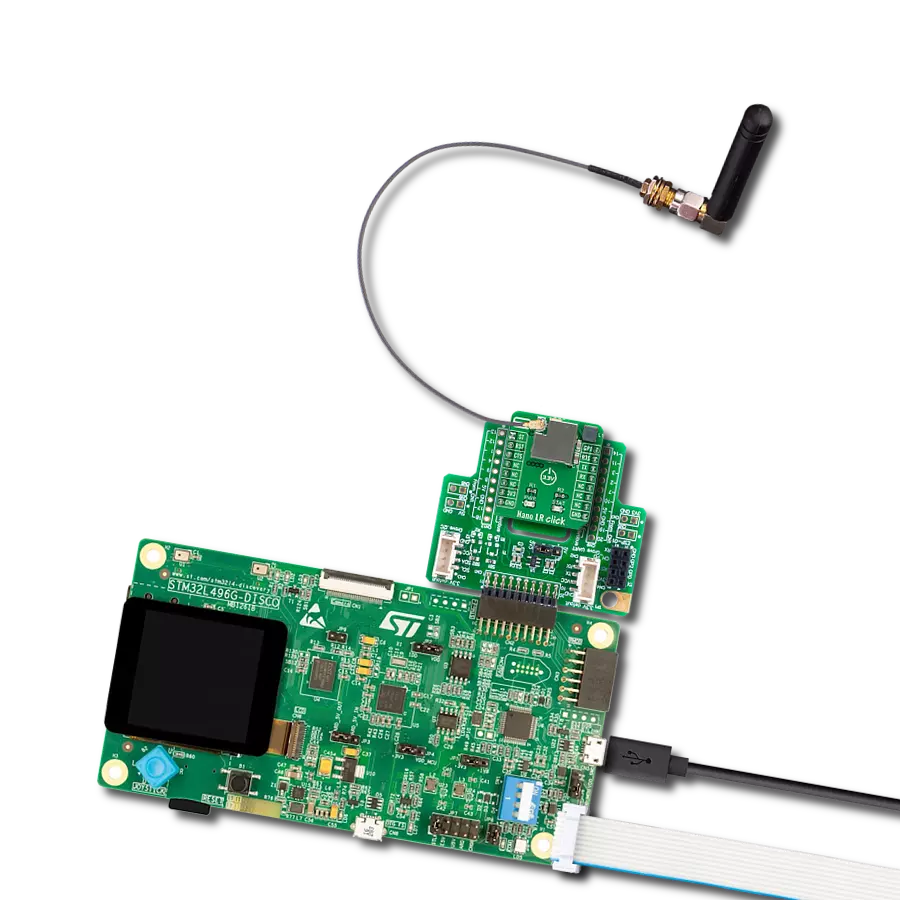
开发板
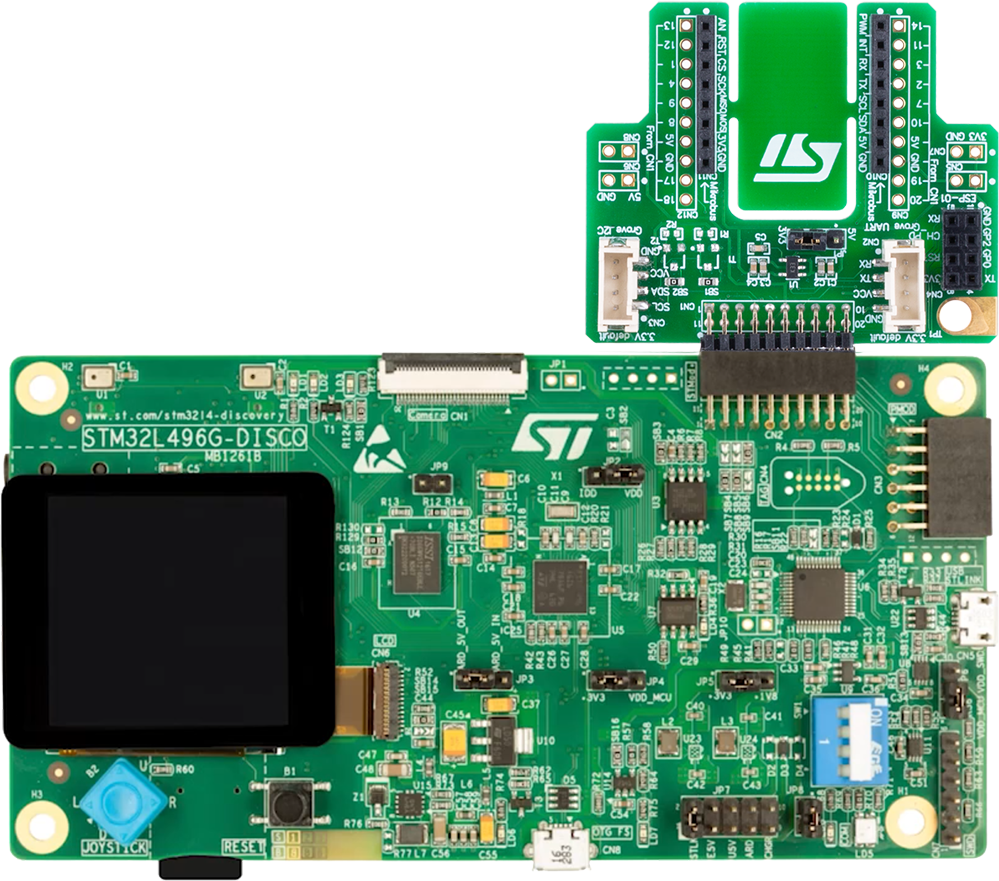
Discovery kit with STM32L496AG MCU
编译器
NECTO Studio
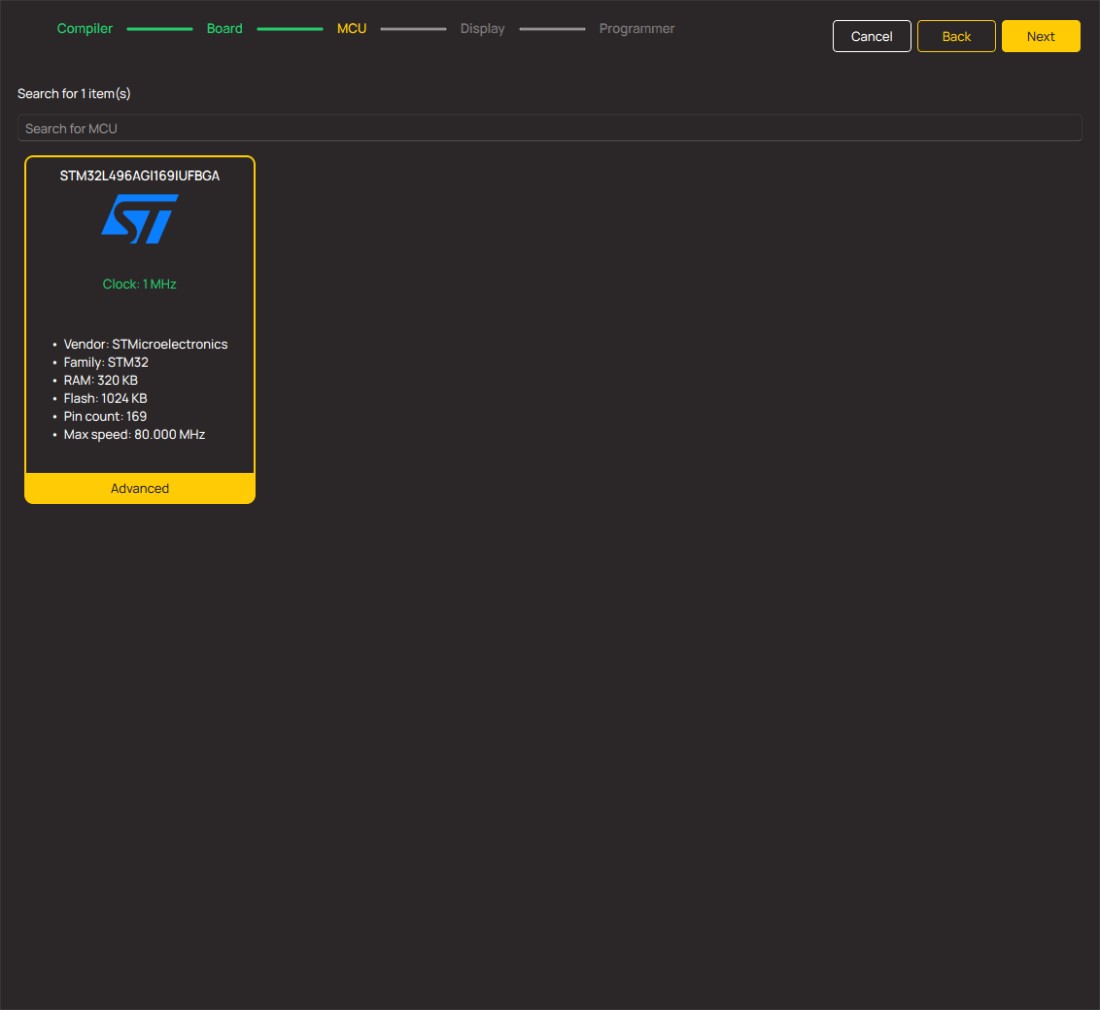
微控制器单元
STM32L496AG
通过我们的915MHz收发器确保您数据传输需求的未来,这些收发器是可靠的长距离连接的基础,开启了医疗、交通等领域的创新之门。
A
A
硬件概览
它是如何工作的?
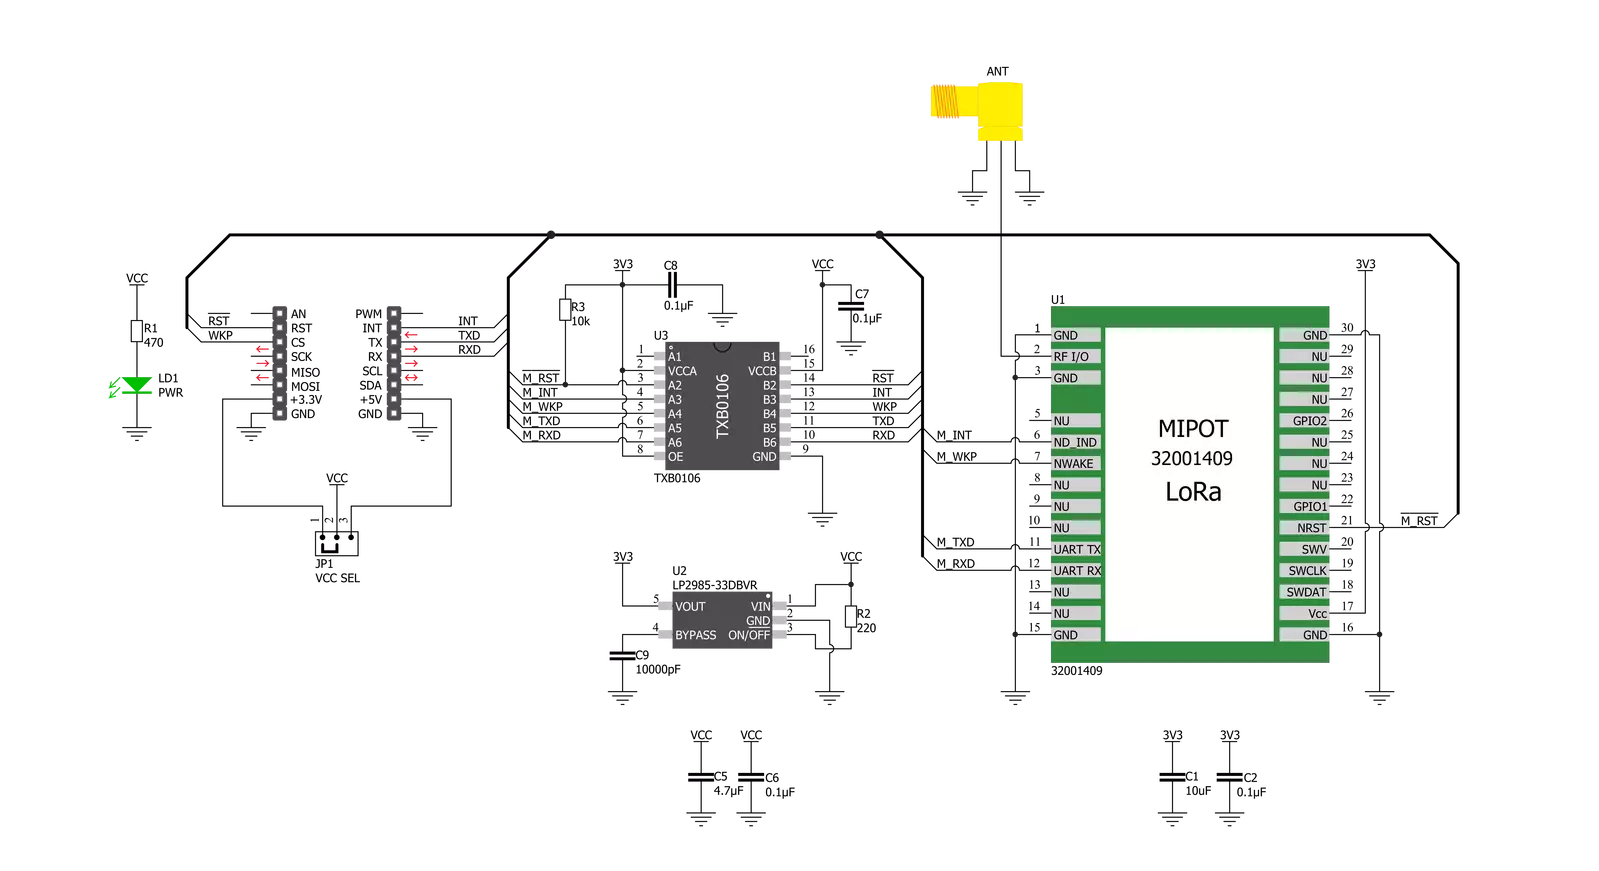
LR 5 Click基于Mipot的32001409,这是一款低功耗、基于长距离RF技术的收发模块。它提供了高干扰免疫力的长距离扩频通信。网络采用星形拓扑结构,终端节点以占空比模式工作,显著降低了整体功耗。该Click板™具有嵌入式LoRaWAN Class A和Class C合规堆栈,为开发低功耗、高度集成的物联网网络、安全系统、报警网络等需要简单可靠网络解决方案的应用提供了简单可靠的解决方案。该Click板™可以使用简单的AT命令配置为END节点或MASTER节点。作为MASTER节点工作时,Click板™
可以使用一组特定于主节点的命令,例如配对命令。此命令将把请求配对的终端节点添加到主网络表中。作为END节点工作时,LR 5 Click可以发出特定于从节点的命令/请求,例如配对请求命令,允许该终端节点与主节点配对。LR 5 Click通过UART接口与MCU通信,使用常用的UART RX和TX引脚,数据传输速率高达115200bps。除了这些功能外,32001409还使用了几个连接到mikroBUS™插座的GPIO引脚。连接到mikroBUS™的CS引脚的WK引脚表示用于唤醒设备的唤醒功能,而mikroBUS™插座
上的RST引脚可以通过将该引脚置于低逻辑状态来执行硬件复位功能。该Click板™还具有连接到mikroBUS™插座的INT引脚的指示器,成功接收数据包并验证校验和后,将向用户提供反馈。LR 5 Click具有50Ω阻抗的SMA天线连接器,因此可以配备MIKROE提供的适当天线。该Click板™可以通过VCC SEL跳线选择在3.3V或5V逻辑电平下运行,这样,3.3V和5V的MCU都可以正确使用通信线路。此外,该Click板™配备了包含易于使用的函数和示例代码的库,可用作进一步开发的参考。

功能概述
开发板
32L496GDISCOVERY Discovery 套件是一款功能全面的演示和开发平台,专为搭载 Arm® Cortex®-M4 内核的 STM32L496AG 微控制器设计。该套件适用于需要在高性能、先进图形处理和超低功耗之间取得平衡的应用,支持无缝原型开发,适用于各种嵌入式解决方案。STM32L496AG 采用创新的节能架构,集成
了扩展 RAM 和 Chrom-ART 图形加速器,在提升图形性能的同时保持低功耗,使其特别适用于音频处理、图形用户界面和实时数据采集等对能效要求较高的应用。为了简化开发流程,该开发板配备了板载 ST-LINK/V2-1 调试器/编程器,提供即插即用的调试和编程体验,使用户无需额外硬件即可轻松加载、调
试和测试应用程序。凭借低功耗特性、增强的内存能力以及内置调试工具,32L496GDISCOVERY 套件是开发先进嵌入式系统、实现高效能解决方案的理想选择。
微控制器概述
MCU卡片 / MCU
建筑
ARM Cortex-M4
MCU 内存 (KB)
1024
硅供应商
STMicroelectronics
引脚数
169
RAM (字节)
327680
你完善了我!
配件
橡胶天线GSM/GPRS直角是我们广泛阵容中所有GSM Click boards™的完美伴侣。这款专用天线旨在通过令人印象深刻的功能优化您的无线连接。其宽频率范围覆盖824-894/1710-1990MHz或890-960/1710-1890MHz,能够处理各种频段,确保无缝且可靠的连接。天线具有50欧姆的阻抗和2dB的增益,增强了信号接收和传输。其70/180MHz的带宽为多种应用提供了灵活性。垂直极化进一步提升了其性能。天线的最大输入功率容量为50W,即使在苛刻的条件下也能确保强大的通信。这款天线长度紧凑,仅为50毫米,并配有SMA公头连接器,橡胶天线GSM/GPRS直角是您的无线通信需求的多功能且紧凑的解决方案。

使用的MCU引脚
mikroBUS™映射器
“仔细看看!”
Click board™ 原理图
一步一步来
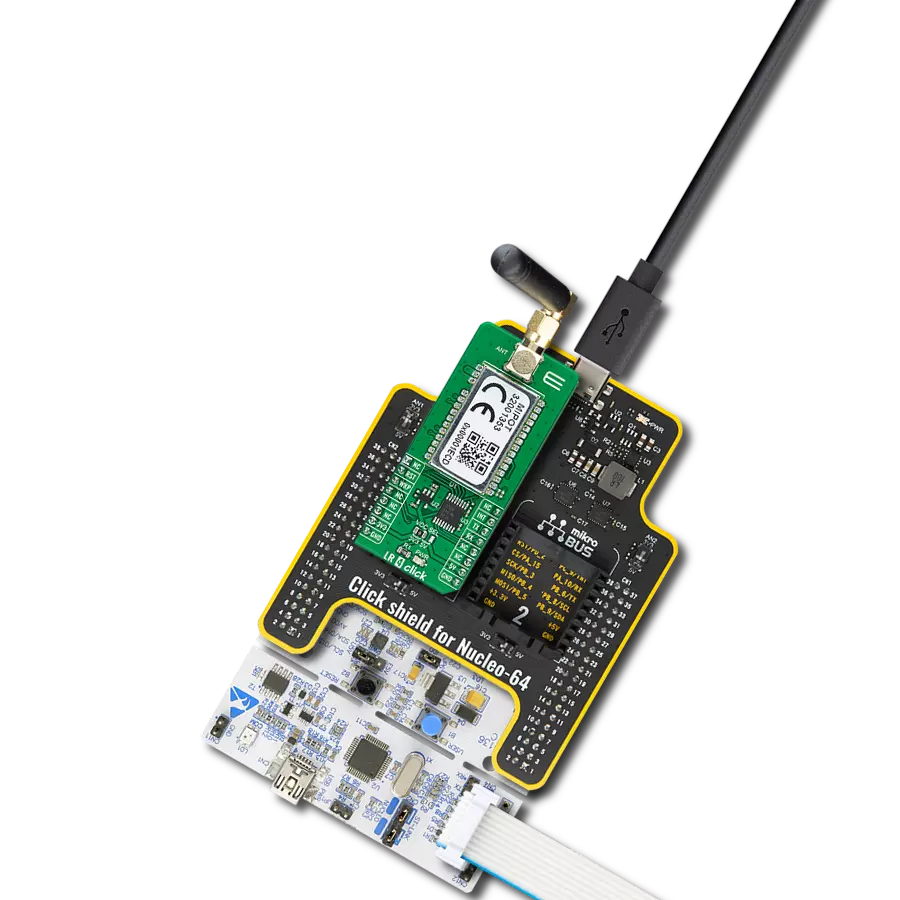
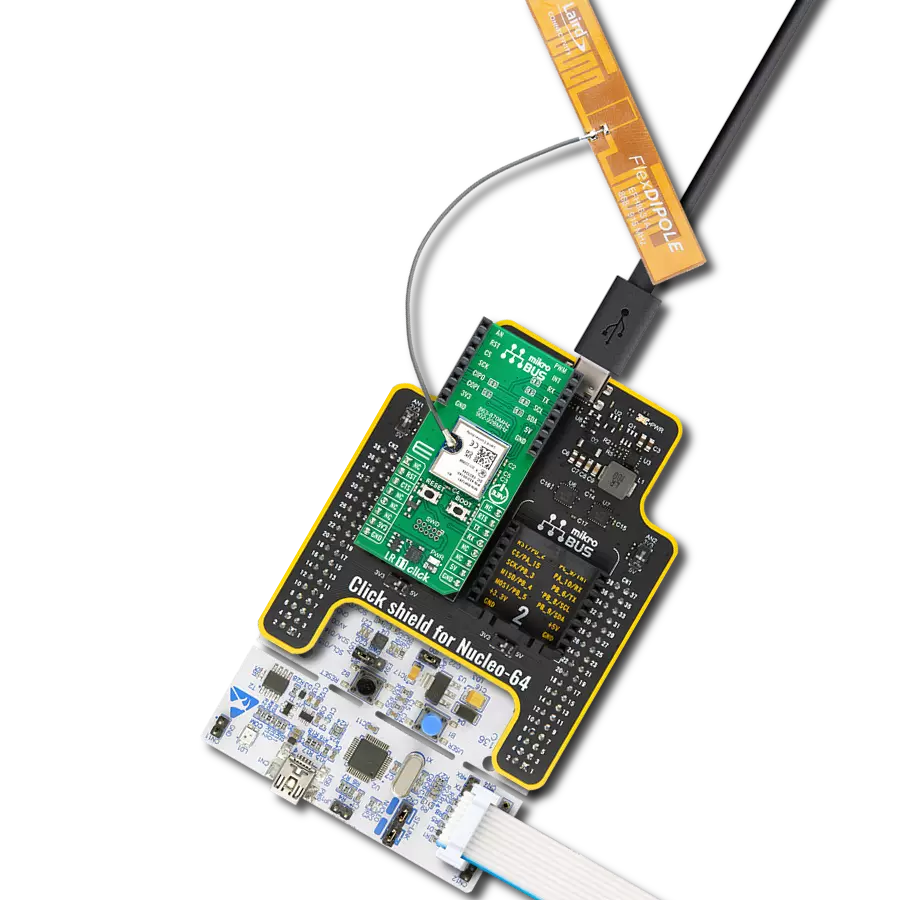
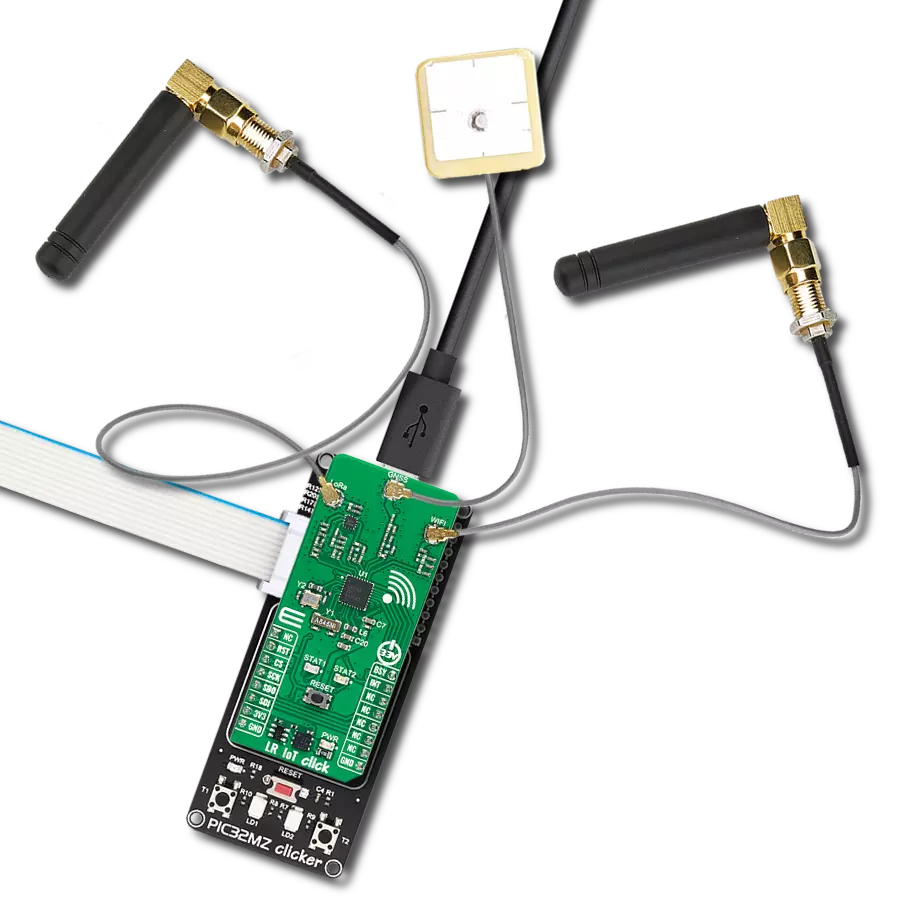
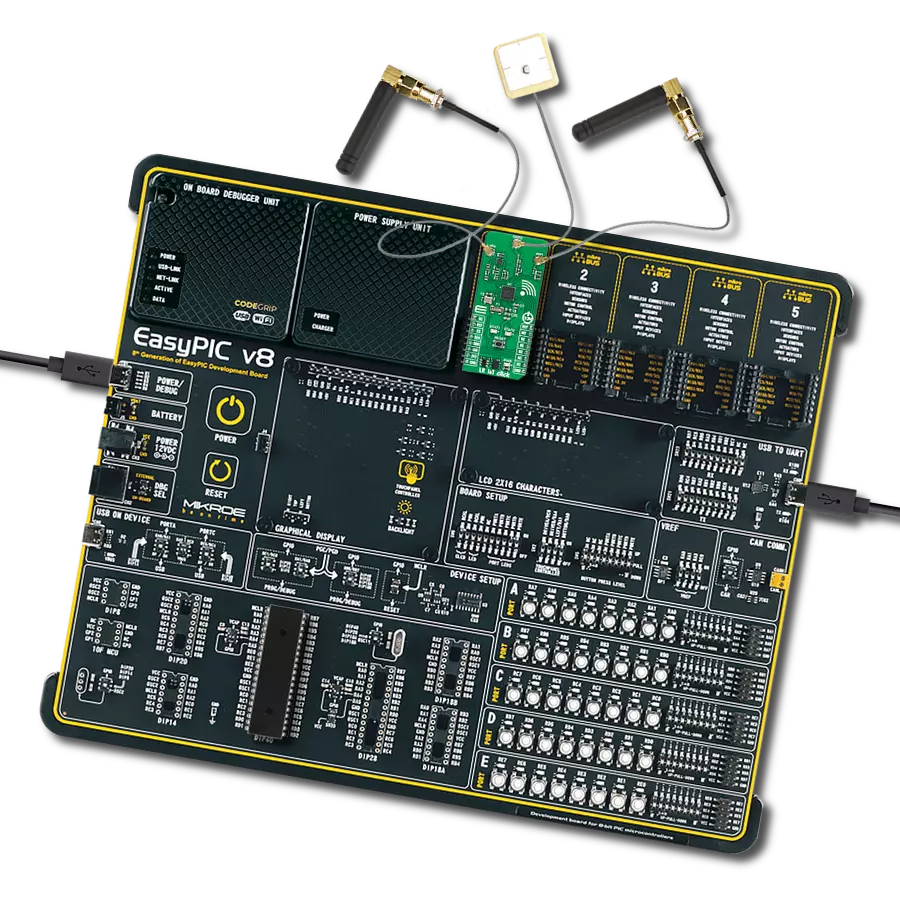
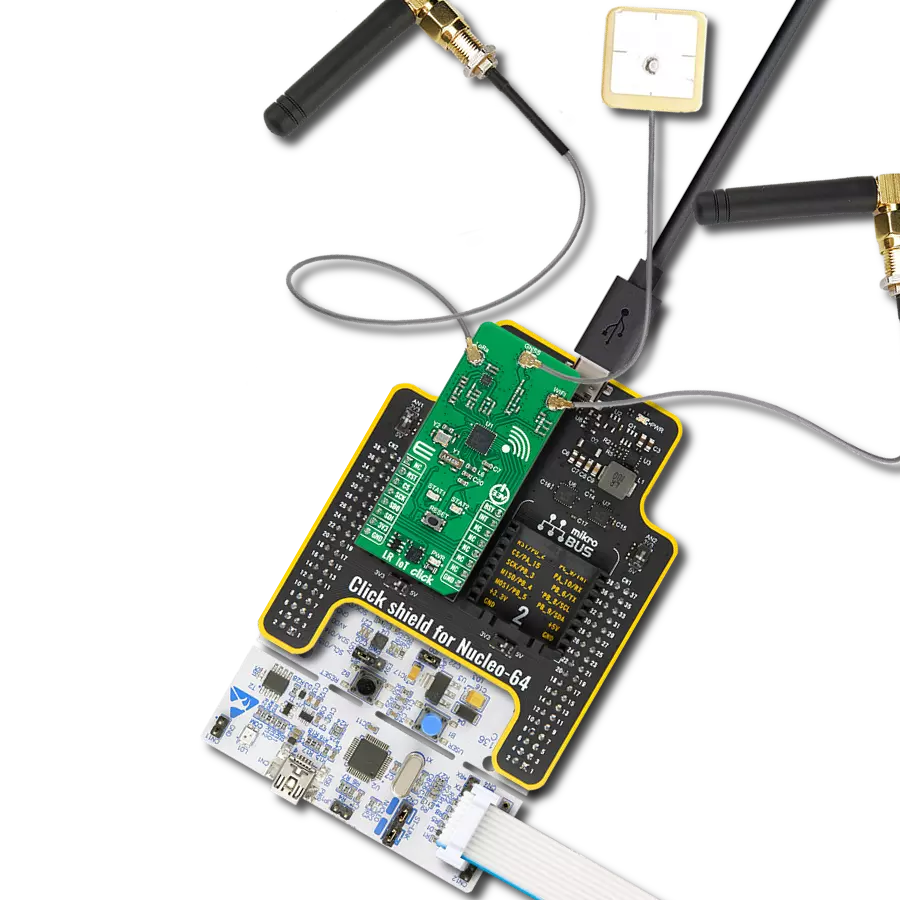
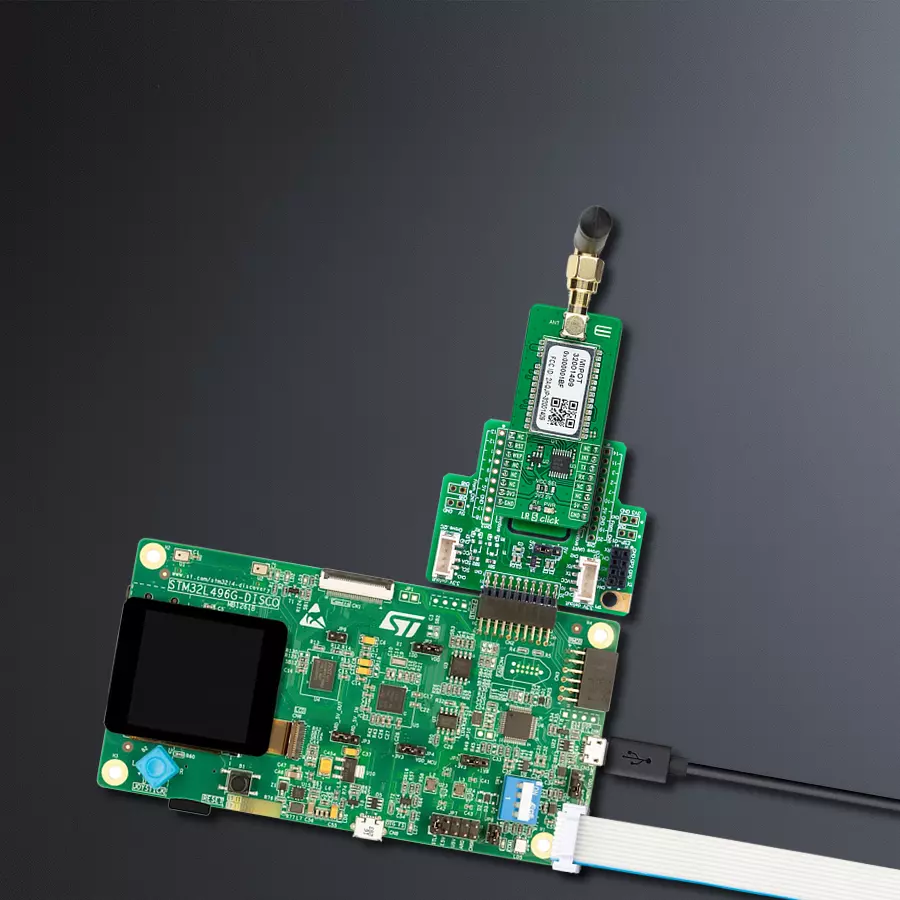
项目组装
从选择您的开发板和Click板™开始。以Discovery kit with STM32L496AG MCU作为您的开发板开始。


软件支持
库描述
该库包含 LR 5 Click 驱动程序的 API。
关键功能:
lr5_get_fw_version_cmd- 该命令允许用户获取32位固件版本。lr5_get_serial_no_cmd- 该命令允许用户获取32位Mipot序列号。lr5_get_session_status_cmd- 该命令允许用户获取模块当前状态。
开源
代码示例
完整的应用程序代码和一个现成的项目可以通过NECTO Studio包管理器直接安装到NECTO Studio。 应用程序代码也可以在MIKROE的GitHub账户中找到。
/*!
 * \file
 * \brief LR5 Click example
 *
 * # Description
 * This example reads and processes data from LR 5 Clicks.
 *
 * The demo application is composed of two sections :
 *
 * ## Application Init
 * Initializes UART interface and UART interrupt, and performs a module reset commands.
 *
 * ## Application Task
 * Performs a group of commands to get FW version, the serial number provided by Mipot,
 * DevEUI, the session status, the activation status and the parameters for the selected channel.
 * Also sets the next transmission data rate to the desired value.
 * The responses from the Mipot module to the host will be sent to the uart terminal.
 *
 * ## Additional Function
 * - lr5_process - The general process of collecting data the module sends.
 * - make_response - Stores data from the module to the response structure.
 * - log_response -  Sends the received response from the module to the uart terminal.
 * - wait_response - Waits until response from the module is ready and then calls the
 *                 response logging function, or writes the error message on the uart terminal.
 *
 *
 * \author MikroE Team
 *
 */
// ------------------------------------------------------------------- INCLUDES

#include "board.h"
#include "log.h"
#include "lr5.h"
#include "string.h"

#define PROCESS_COUNTER 10
#define PROCESS_RX_BUFFER_SIZE 300

// ------------------------------------------------------------------ VARIABLES

static lr5_t lr5;
static log_t logger;
lr5_cmd_t response;

// ------------------------------------------------------- ADDITIONAL FUNCTIONS

static void lr5_process ( void )
{
    int32_t rsp_size;
    uint8_t process_cnt = 10;

    uint8_t check_buf_cnt;

    while( process_cnt != 0 )
    {
        rsp_size = lr5_generic_read( &lr5, lr5.rx_dat, PROCESS_RX_BUFFER_SIZE );

        if ( rsp_size > 0 )
        {
            // Validation of the received data
            for ( check_buf_cnt = 0; check_buf_cnt < rsp_size; check_buf_cnt++ )
            {
                lr5_uart_isr( &lr5 );
            }
        }
        else
        {
            process_cnt--;

            // Process delay
            Delay_100ms( );
        }
    }
}

void make_response ( uint8_t *rsp_code, uint8_t *rsp_length, uint8_t *rsp_data )
{
    uint8_t rsp_idx;

    response.cmd_code   = *rsp_code;
    response.cmd_length = *rsp_length;

    for ( rsp_idx = 0; rsp_idx < response.cmd_length; rsp_idx++ )
    {
        response.cmd_data[ rsp_idx ] = *rsp_data;
        rsp_data++;
    }
}

void log_response ( )
{
    uint8_t rsp_idx;

    log_printf( &logger, "** OPCODE : 0x%.2X\r\n", ( uint16_t ) response.cmd_code );

    log_printf( &logger, "** RESPONSE LENGTH : 0x%.2X\r\n", ( uint16_t ) response.cmd_length );

    log_printf ( &logger, "** RESPONSE : " );
    for ( rsp_idx = 0; rsp_idx < response.cmd_length; rsp_idx++ )
    {
        log_printf( &logger, "0x%.2X ", ( uint16_t ) response.cmd_data[ rsp_idx ] );
    }
    log_printf( &logger, "\r\n" );

    log_printf( &logger, "***********************************************\r\n" );
    log_printf( &logger, "\r\n" );
}

void wait_response ( )
{
    LR5_RETVAL resp_code;
    do
    {
        lr5_process(  );
        resp_code = lr5_response_ready( &lr5 );
    }
    while ( resp_code == LR5_RESPONSE_NOT_RECEIVED );

    resp_code = lr5_task( &lr5 );

    switch ( resp_code )
    {
        case LR5_CMD_RESPONSE_READY :
        {
            log_response( );
        break;
        }
        case LR5_IND_RESPONSE_READY :
        {
            log_response( );
        break;
        }
        case LR5_FRAME_HEADER_ERR :
        {
            log_printf( &logger, "** Frame Header Error **\r\n" );
            log_printf( &logger, "***********************************************\r\n" );
            log_printf( &logger, "\r\n" );
        break;
        }
        case LR5_CMD_RESPONSE_ERR :
        {
            log_printf( &logger, "** Response Code Error **\r\n" );
            log_printf( &logger, "***********************************************\r\n" );
            log_printf( &logger, "\r\n" );
        break;
        }
        case LR5_CHKSUM_ERR :
        {
            log_printf( &logger, "** Checksum Error **\r\n" );
            log_printf( &logger, "***********************************************\r\n" );
            log_printf( &logger, "\r\n" );
        break;
        }
        default :
        {
        break;
        }
    }
    Delay_ms ( 1000 );
}

// ------------------------------------------------------ APPLICATION FUNCTIONS

void application_init ( void )
{
    log_cfg_t log_cfg;
    lr5_cfg_t cfg;

    /**
     * Logger initialization.
     * Default baud rate: 115200
     * Default log level: LOG_LEVEL_DEBUG
     * @note If USB_UART_RX and USB_UART_TX
     * are defined as HAL_PIN_NC, you will
     * need to define them manually for log to work.
     * See @b LOG_MAP_USB_UART macro definition for detailed explanation.
     */
    LOG_MAP_USB_UART( log_cfg );
    log_init( &logger, &log_cfg );
    log_info( &logger, "---- Application Init ----" );

    //  Click initialization.

    lr5_cfg_setup( &cfg );
    LR5_MAP_MIKROBUS( cfg, MIKROBUS_1 );
    lr5_init( &lr5, &cfg );

    lr5_response_handler_set( &lr5, &make_response );
    Delay_ms ( 1000 );

    lr5_reset_cmd( &lr5 );
    wait_response( );
    Delay_ms ( 1000 );
    lr5_factory_reset_cmd( &lr5 );
    wait_response( );

    log_printf( &logger, "** LR 5 (MIPOT 32001409) reset is done **\r\n" );
    log_printf( &logger, "\r\n" );
    Delay_ms ( 1000 );
}

void application_task ( void )
{
    lr5_process(  );

    log_printf( &logger, "** FW version reading...\r\n" );
    lr5_get_fw_version_cmd( &lr5 );
    wait_response( );

    log_printf( &logger, "** Serial number reading...\r\n" );
    lr5_get_serial_no_cmd( &lr5 );
    wait_response( );

    log_printf( &logger, "** DevEUI reading...\r\n" );
    lr5_get_dev_eui_cmd( &lr5 );
    wait_response( );

    log_printf( &logger, "** Session status reading...\r\n" );
    lr5_get_session_status_cmd( &lr5 );
    wait_response( );
    switch ( response.cmd_data[ 0 ] )
    {
        case 0x00 :
        {
            log_printf( &logger, "Idle.\r\n" );
        break;
        }
        case 0x01 :
        {
            log_printf( &logger, "Busy (LR session running).\r\n" );
        break;
        }
        case 0x02 :
        {
            log_printf( &logger, "Device not activated.\r\n" );
        break;
        }
        case 0x03 :
        {
            log_printf( &logger, "Delayed.\r\n" );
        break;
        }
        default :
        {
        break;
        }
    }
    log_printf( &logger, "***********************************************\r\n" );
    Delay_ms ( 1000 );

    log_printf( &logger, "** Activation status reading...\r\n" );
    lr5_get_activation_status_cmd( &lr5 );
    wait_response( );
    switch ( response.cmd_data[ 0 ] )
    {
        case 0x00 :
        {
            log_printf( &logger, "Not activated.\r\n" );
        break;
        }
        case 0x01 :
        {
            log_printf( &logger, "Joining...\r\n" );
        break;
        }
        case 0x02 :
        {
            log_printf( &logger, "Joined.\r\n" );
        break;
        }
        case 0x03 :
        {
            log_printf( &logger, "MAC ERROR.\r\n" );
        break;
        }
        default :
        {
        break;
        }
    }
    log_printf( &logger, "***********************************************\r\n" );
    Delay_ms ( 1000 );

    log_printf( &logger, "** Next TX Data Rate setting...\r\n" );
    lr5_set_next_dr_cmd( &lr5, LR5_SF10_125KHZ );
    wait_response( );
    if ( response.cmd_data[ 0 ] == 0x00 )
    {
        log_printf( &logger, "Success!\r\n" );
    }
    else
    {
        log_printf( &logger, "Error!\r\n" );
    }
    log_printf( &logger, "***********************************************\r\n" );
    Delay_ms ( 1000 );

    log_printf( &logger, "** Channel parameters reading...\r\n" );
    lr5_get_ch_param_cmd( &lr5, LR5_CH_IDX_15 );
    wait_response( );
    // 10 seconds delay
    Delay_ms ( 1000 );
    Delay_ms ( 1000 );
    Delay_ms ( 1000 );
    Delay_ms ( 1000 );
    Delay_ms ( 1000 );
    Delay_ms ( 1000 );
    Delay_ms ( 1000 );
    Delay_ms ( 1000 );
    Delay_ms ( 1000 );
    Delay_ms ( 1000 );
}

int main ( void )
{
    /* Do not remove this line or clock might not be set correctly. */
    #ifdef PREINIT_SUPPORTED
    preinit();
    #endif

    application_init( );

    for ( ; ; )
    {
        application_task( );
    }

    return 0;
}


// ------------------------------------------------------------------------ END
额外支持
资源
类别:远距离无线通信