
Published 3月 24, 2025
Button-Triggered Distance Measurement with Relay Control
基于精确距离感应的自动继电器控制,配合交互式按键触发系统实现智能响应
你将学到和构建的内容
简介
Button-Triggered Distance Measurement with Relay Control 解决方案集成了 Button Play Click、LightRanger 3 Click 和 Relay 3 Click,构建了一个精确、交互式的距离感应系统,具备自动继电器控制功能。该方案适用于基于接近度的自动化、安全系统和智能控制界面,在按下按钮时测量目标物体的距离,并根据平均值控制两个继电器。如果测得的距离小于或等于 100mm,则两个继电器均被激活;如果距离大于 100mm,则两个继电器关闭。系统还具备平滑的 LED 背光渐变效果和实时 UART 日志输出,提供清晰的反馈与精确的控制,非常适用于需要灵敏物体检测与动作执行的应用场景。
mikroBUS 1
Button PLAY Click
Button PLAY Click 是一款非常有趣的交互式 Click board™ 组件,它采用集成的电容式触摸传感器显示屏,呈现按钮形式。利用先进的电容式触摸感应技术,CTHS15CIC05ARROW 传感器可以成功替代传统机械按钮,使用户界面设计更加简洁且可靠。除了触摸检测功能外,该传感器还带有一个带背光的绿色箭头图标,使其成为构建各种时尚且视觉吸引力强的界面的理想选择。

mikroBUS 2
LightRanger 3 Click
LightRanger 3 Click 是一款高精度测距 Click 板™,基于 ToF(飞行时间)测量原理。它搭载了 RF Digital 公司的 Simblee™ 兼容 RFD77402 测距模块,该模块集成完整的测量系统,使用非常简单,仅通过 I2C 接口和 INT 引脚与主控 MCU 进行通信。其核心组件包括 VCSEL(垂直腔面发射激光器),用于发射 850nm 波长的窄带红外调制光束,以及接收传感器,用于检测反射光。该模块可测量距离最长可达 2000mm,测量精度可达 ±10%。此外,该设备符合 Class 1 激光产品标准,在不可见红外光谱范围内运行,确保安全性。

mikroBUS 3
Relay 3 Click
Relay 3 Click 是一款双继电器 Click 板™,配备两个单刀双掷(SPDT)继电器,可由主控微控制器(MCU)的输出引脚控制。它提供了一种优雅且便捷的解决方案,可用于控制各种电源应用。该 Click 板™ 采用两个 SRD-5VDC-SL-C 继电器,这些密封式继电器需要 5V 线圈电压,工作时功耗约为 0.4W。它们能够切换高达 28VDC 的负载电压,并可承载高达 7A 的电流。Relay 3 Click 可广泛应用于基于 PLC(可编程逻辑控制器)的系统、远程开关控制以及其他类似应用场景。

功能概述
开发板
UNI-DS v8 是一款功能强大的开发板,专为快速嵌入式应用开发而设计,支持多种 MCU(STM32、Kinetis、TIVA、PIC、AVR 等),并配备全球首款内置 WiFi 调试器/编程器。它集成了先进的 CODEGRIP 模块,支持 JTAG、SWD 和 SWO Trace 调试,并提供多种输入选项的稳压电源(USB-C、12V、电池)。此外,该开发板具备丰富的连接选项,包括 USB-UART、USB HOST/DEVICE、CAN 和以太网。借助 mikroBUS™、SiBRAIN 插槽以及双显示支持,它可无缝融入 MIKROE 生态系统,兼容所有 Click boards™,为高效、沉浸式的原型开发提供理想平台。

微控制器概述
MCU卡片 / MCU
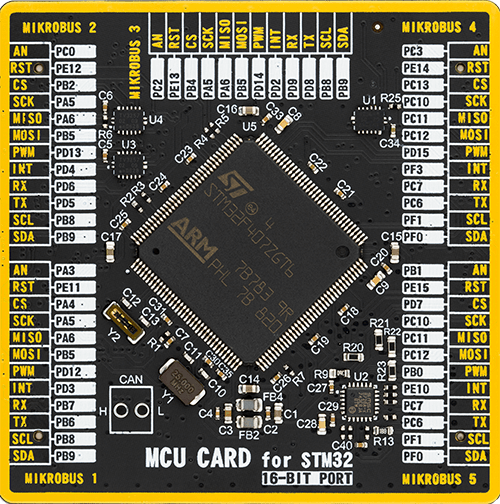
类型
8th Generation
建筑
ARM Cortex-M4
MCU 内存 (KB)
1024
硅供应商
STMicroelectronics
引脚数
144
RAM (字节)
196608
一步一步来
项目组装
首先,选择您的开发板 - UNI-DS v8


实时跟踪您的结果
应用程序输出
1. 应用程序输出 - 在调试模式下,“应用程序输出”窗口支持实时数据监控,直接提供执行结果的可视化。请按照提供的教程正确配置环境,以确保数据正确显示。

2. UART 终端 - 使用UART Terminal通过USB to UART converter监视数据传输,实现Click board™与开发系统之间的直接通信。请根据项目需求配置波特率和其他串行设置,以确保正常运行。有关分步设置说明,请参考提供的教程。

3. Plot 输出 - Plot功能提供了一种强大的方式来可视化实时传感器数据,使趋势分析、调试和多个数据点的对比变得更加直观。要正确设置,请按照提供的教程,其中包含使用Plot功能显示Click board™读数的分步示例。在代码中使用Plot功能时,请使用以下函数:plot(insert_graph_name, variable_name);。这是一个通用格式,用户需要将“insert_graph_name”替换为实际图表名称,并将“variable_name”替换为要显示的参数。

软件支持
库描述
Button-Triggered Distance Measurement with Relay Control 使用 NECTO Studio 开发,确保兼容 mikroSDK 的开源库和工具。该解决方案采用即插即用的设计,支持快速实施和测试,并与所有配备 mikroBUS™ 插座的开发板、入门套件和 mikromedia 板完全兼容。
示例描述
Button-Triggered Distance Measurement with Relay Control 集成了 Button Play Click、LightRanger 3 Click 和 Relay 3 Click,在按下按钮时测量目标物体的距离。当平均距离小于或等于 100mm 时,两个继电器将开启;当距离超过 100mm 时,两个继电器将关闭。按钮背光在按下时平滑渐亮,释放时渐暗,提供直观的视觉反馈。距离通过多次读取求平均以提升精度,测量结果通过 UART 输出日志。
关键功能:
initialize_button_play- 初始化 Button Play Click,配置用于控制 LED 背光的 PWM,并启动 PWM 信号。如果初始化失败,记录错误并停止执行。initialize_light_ranger- 初始化 LightRanger 3 Click 并配置传感器。如果传感器初始化失败,记录错误并停止执行。initialize_relay- 初始化 Relay 3 Click,根据距离测量配置继电器控制。如果初始化失败,记录错误并停止执行。update_button_backlight- 根据按钮状态平滑控制背光亮度。按下时渐亮,松开时渐暗。measure_and_log_distance- 使用 LightRanger 3 Click 进行单次距离测量,对多次结果求平均,并通过 UART 输出平均值。case_both_relays- 根据平均距离控制继电器。如果平均距离小于或等于 100mm,两个继电器开启;否则,两个继电器关闭。
应用初始化
初始化流程设置 UART 日志,配置所有 Click 板,并验证硬件是否准备就绪。如初始化过程中出现错误,则记录错误并停止程序运行。
应用任务
主应用循环持续执行以下任务:
1. 检测按钮按下事件并触发距离测量。
2. 多次读取距离值,求平均并通过 UART 输出结果。
3. 按下按钮时背光渐亮,释放按钮时背光渐暗。
4. 根据平均距离控制两个继电器:若小于或等于 100mm,继电器开启;若超过 100mm,继电器关闭。
5. 记录按钮按下/释放事件及距离测量结果。
开源
代码示例
完整的应用程序代码和一个现成的项目可以通过NECTO Studio包管理器直接安装到NECTO Studio。 应用程序代码也可以在MIKROE的GitHub账户中找到。
/*
 * Solution Name: Button-Triggered Distance Monitoring with Relay Control
 *
 * Description:
 * This embedded application uses Button Play Click and LightRanger 3 Click
 * to measure the distance to an object WHEN A BUTTON IS PRESSED. The system
 * continuously measures the distance while the button is held down and controls
 * two relays (both relays are located on the Relay 3 Click) based on the
 * average distance.
 *
 * - If the average distance is ? 100 mm: Both relays turn ON.
 * - If the average distance is > 100 mm: Both relays turn OFF.
 *
 * The button's backlight fades in on press and fades out on release, providing
 * visual feedback. Distance measurements are averaged over multiple readings
 * to reduce sensor noise and improve accuracy.
 *
 * The system utilizes the following Click boards:
 *   - Button Play Click: Captures button press/release events and controls
 *     LED backlight.
 *   - LightRanger 3 Click: Measures the distance to a nearby object using
 *     a laser sensor.
 *   - Relay 3 Click: Controls external devices based on distance thresholds.
 *
 * The `application_init` function initializes the logger and all Click boards,
 * ensuring proper startup conditions. Any initialization failure is logged,
 * and the system halts.
 *
 * The `application_task` function monitors the button state, triggers distance
 * measurements, calculates the average distance, and toggles the relays based
 * on the distance threshold.
 *
 * Hardware Setup:
 *   - MIKROBUS_1: Button Play Click
 *   - MIKROBUS_2: LightRanger 3 Click
 *   - MIKROBUS_3: Relay 3 Click
 *
 * Key Features:
 *   - Button-controlled distance monitoring with real-time relay control.
 *   - Multi-sample averaging to reduce sensor reading noise.
 *   - Smooth LED fade-in/out on button press/release.
 *   - UART logging for measurement data and system events.
 *   - Automatic relay switching based on distance threshold.
 *
 * Development Environment:
 *   - [NECTO Studio](https://www.mikroe.com/necto)
 *   - [mikroSDK v2.0](https://www.mikroe.com/mikrosdk) framework
 *   - MIKROE [Click boards](https://www.mikroe.com/click-boards) Add-ons
 *
 * Author: Branko Jaksic
 * Date: 2025
 */

// ------------------------------------------------------------------- INCLUDES
#include "log.h"
#include "board.h"
#include "relay3.h"
#include "buttonplay.h"
#include "lightranger3.h"

// ------------------------------------------------------------------ VARIABLES
static relay3_t relay3;
static buttonplay_t buttonplay;
static lightranger3_t lightranger3;
static log_t logger;

static int case_both_relays_switch = 0;

// ---------------------------------------------- PRIVATE FUNCTION DECLARATIONS
/**
 * @brief Toggle Both Relays On/Off
 *
 * This function toggles the state of both relays connected to the Relay 3 Click board.
 * It uses a state switch (`case_both_relays_switch`) to alternate between turning both
 * relays ON and OFF.
 *
 * - When `case_both_relays_switch` is `0`, both relays are turned ON, and a message is
 *   logged via UART.
 * - When `case_both_relays_switch` is `1`, both relays are turned OFF, and a corresponding
 *   message is logged.
 *
 * The function updates the `case_both_relays_switch` variable to track the current state,
 * flipping its value between `0` and `1` on each call.
 *
 * This function can be used in scenarios where relays need to be toggled at regular intervals
 * or based on specific conditions (e.g., distance threshold crossing).
 *
 * @note The function relies on a global variable `case_both_relays_switch` to manage state.
 */
static void case_both_relays ( );

// ----------------------------------------------- PUBLIC FUNCTION DECLARATIONS

/**
 * @brief Initializes the Button Play Click board.
 *
 * Configures the Button Play Click board, sets up the PWM for LED
 * backlight control, and starts the PWM signal. If initialization fails,
 * the function logs an error and halts execution.
 *
 * @note The Button Play Click is connected to MIKROBUS_1.
 */
void initialize_button_play( void );

/**
 * @brief Initializes the LightRanger 3 Click board.
 *
 * Configures the LightRanger 3 Click board and performs device initialization.
 * If the sensor fails to initialize, the function logs an error and halts
 * execution.
 *
 * @note The LightRanger 3 Click is connected to MIKROBUS_2.
 */
void initialize_light_ranger( void );

/**
 * @brief Initializes the Relay 3 Click board.
 *
 * Configures the Relay 3 Click board and performs device initialization.
 * If the Relay fails to initialize, the function logs an error and halts
 * execution.
 *
 * @note The Relay 3 Click is connected to MIKROBUS_3.
 */
void initialize_relay_3( void );

/**
 * @brief Updates the button backlight brightness.
 *
 * Smoothly fades the button's backlight LED in or out, depending on the
 * button state. When the button is pressed, the backlight gradually brightens.
 * When released, the backlight gradually dims.
 *
 * @param[in] is_pressed  Boolean indicating the button state:
 *                        - `true`: Fade in the backlight.
 *                        - `false`: Fade out the backlight.
 */
void update_button_backlight( bool is_pressed );

/**
 * @brief Measures and logs the distance using the LightRanger 3 Click.
 *
 * Takes a single distance measurement, retrieves the distance value,
 * and logs it via UART. This function is useful for quick,
 * real-time distance readings.
 */
void measure_and_log_distance( void );

// ------------------------------------------------------ APPLICATION FUNCTIONS
static void case_both_relays ( )
{
    if ( case_both_relays_switch == 0 )
    {
        relay3_relay_on( &relay3, RELAY3_BOTH_RELAYS );
        log_printf( &logger, "   Both relays ON.   \r\n" );

        case_both_relays_switch++;
    }
    else if ( case_both_relays_switch == 1 )
    {
        relay3_relay_off( &relay3, RELAY3_BOTH_RELAYS );
        log_printf( &logger, "   Both relays OFF.   \r\n" );

        case_both_relays_switch--;
    }
}

void application_init( void )
{
    log_cfg_t log_cfg;

    // Logger initialization
    LOG_MAP_USB_UART( log_cfg );
    log_init( &logger, &log_cfg );
    log_info( &logger, "Application Init" );

    initialize_button_play();
    initialize_light_ranger();
    initialize_relay_3();

    log_info( &logger, "Initialization Complete, Starting Application Task" );
}

void initialize_button_play( void )
{
    buttonplay_cfg_t buttonplay_cfg;

    buttonplay_cfg_setup( &buttonplay_cfg );
    BUTTONPLAY_MAP_MIKROBUS( buttonplay_cfg, MIKROBUS_1 );

    if ( buttonplay_init( &buttonplay, &buttonplay_cfg ) == PWM_ERROR )
    {
        log_error( &logger, "Button Play Click initialization failed!" );
        for ( ; ; );  // Halt execution
    }

    buttonplay_set_duty_cycle( &buttonplay, 0.0 );
    buttonplay_pwm_start( &buttonplay );
    log_info( &logger, "Button Play Click initialized successfully." );
}

void initialize_light_ranger( void )
{
    lightranger3_cfg_t lightranger3_cfg;

    lightranger3_cfg_setup( &lightranger3_cfg );
    LIGHTRANGER3_MAP_MIKROBUS( lightranger3_cfg, MIKROBUS_2 );
    lightranger3_init( &lightranger3, &lightranger3_cfg );

    if ( lightranger3_device_init( &lightranger3 ) != 0 )
    {
        log_error( &logger, "LightRanger Click initialization failed!" );
        for ( ; ; );  // Halt execution
    }

    log_info( &logger, "LightRanger Click initialized successfully." );
}

void initialize_relay_3( void ) {
    relay3_cfg_t relay3_cfg;

    relay3_cfg_setup( &relay3_cfg );
    RELAY3_MAP_MIKROBUS( relay3_cfg, MIKROBUS_3 );
    relay3_init( &relay3, &relay3_cfg );
}

void application_task( void )
{
    static uint8_t button_state_old = 0;
    uint8_t button_state = buttonplay_get_button_state( &buttonplay );

    if ( button_state != button_state_old )
    {
        if ( button_state )
        {
            log_printf( &logger, " <-- Button Pressed --> \r\n" );
            update_button_backlight( true );
        }
        else
        {
            log_printf( &logger, " <-- Button Released --> \r\n" );
            update_button_backlight( false );

            // Turn off relays when button is released
            if ( case_both_relays_switch == 1 )
            {
                case_both_relays();
            }
        }

        button_state_old = button_state;
    }

    if ( button_state )
    {
        // Continuously measure distance while button is pressed
        uint32_t distance_sum = 0;
        uint8_t num_measurements = 5;

        for ( uint8_t i = 0; i < num_measurements; i++ )
        {
            lightranger3_take_single_measurement( &lightranger3 );
            distance_sum += lightranger3_get_distance( &lightranger3 );
            Delay_ms( 100 ); // Small delay between measurements
        }

        uint16_t average_distance = ( uint16_t )( distance_sum / num_measurements );
        log_printf( &logger, "Average Distance: %u mm\r\n", average_distance );

        // Control relays based on distance threshold
        if ( average_distance <= 100 && case_both_relays_switch == 0 )
        {
            log_printf( &logger, "Distance ? 100 mm! Turning both relays ON.\r\n" );
            case_both_relays();
        }
        else if ( average_distance > 100 && case_both_relays_switch == 1 )
        {
            log_printf( &logger, "Distance > 100 mm! Turning both relays OFF.\r\n" );
            case_both_relays();
        }
    }
}

void update_button_backlight( bool is_pressed )
{
    float duty_cycle;

    if ( is_pressed )
    {
        for ( uint8_t n = 1; n <= 100; n++ )
        {
            buttonplay_set_duty_cycle( &buttonplay, (float)n / 100 );
            Delay_ms( 10 );
        }
    }
    else
    {
        for ( uint8_t n = 100; n > 0; n-- )
        {
            buttonplay_set_duty_cycle( &buttonplay, (float)n / 100 );
            Delay_ms( 10 );
        }
    }
}

void measure_and_log_distance( void )
{
    lightranger3_take_single_measurement( &lightranger3 );
    uint16_t distance = lightranger3_get_distance( &lightranger3 );

    log_printf( &logger, "Distance: %u mm\r\n", distance );
}

int main( void )
{
    #ifdef PREINIT_SUPPORTED
    preinit();
    #endif

    application_init();

    while ( 1 )
    {
        application_task();
    }

    return 0;
}
额外支持
资源
类别:Human-Machine Interface (HMI)


