使用 PGA302 和 PIC32MZ2048EFM100 获取可靠的重量数据,做出明智的选择
每一克都至关重要!
已发布 7月 22, 2025
点击板
Load Cell 3 Click
开发板
Curiosity PIC32 MZ EF
编译器
NECTO Studio
微控制器单元
PIC32MZ2048EFM100
通过可靠的重量测量实现公平可靠的贸易。
A
A
硬件概览
它是如何工作的?
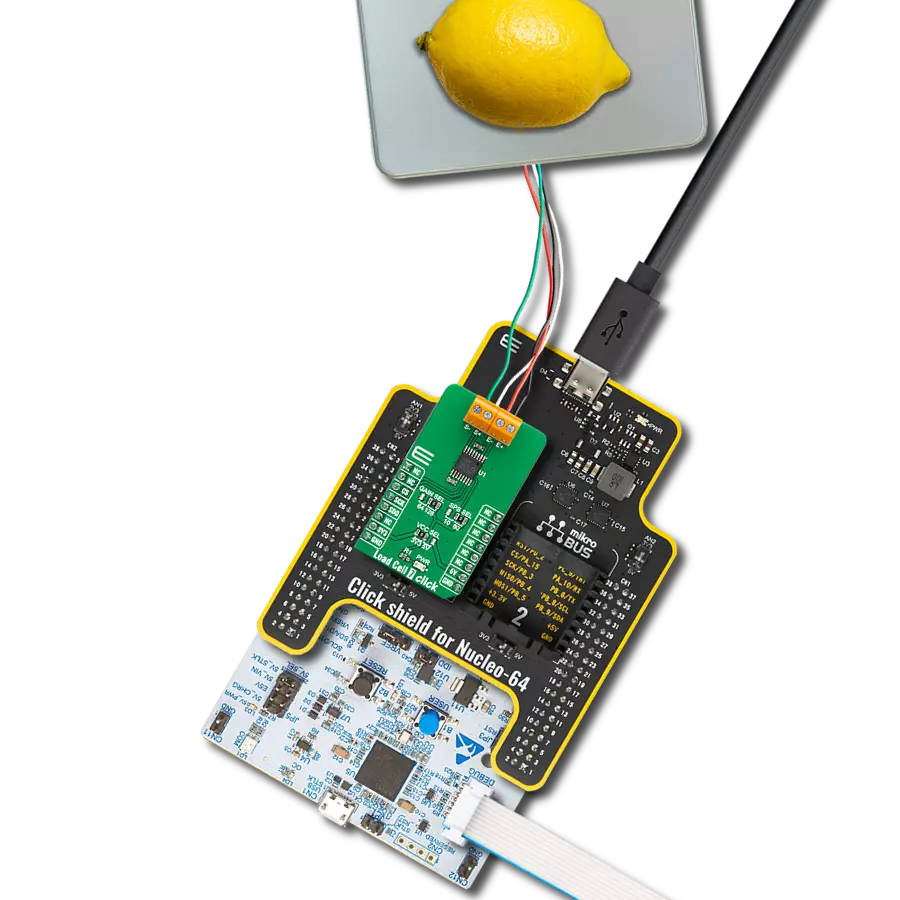
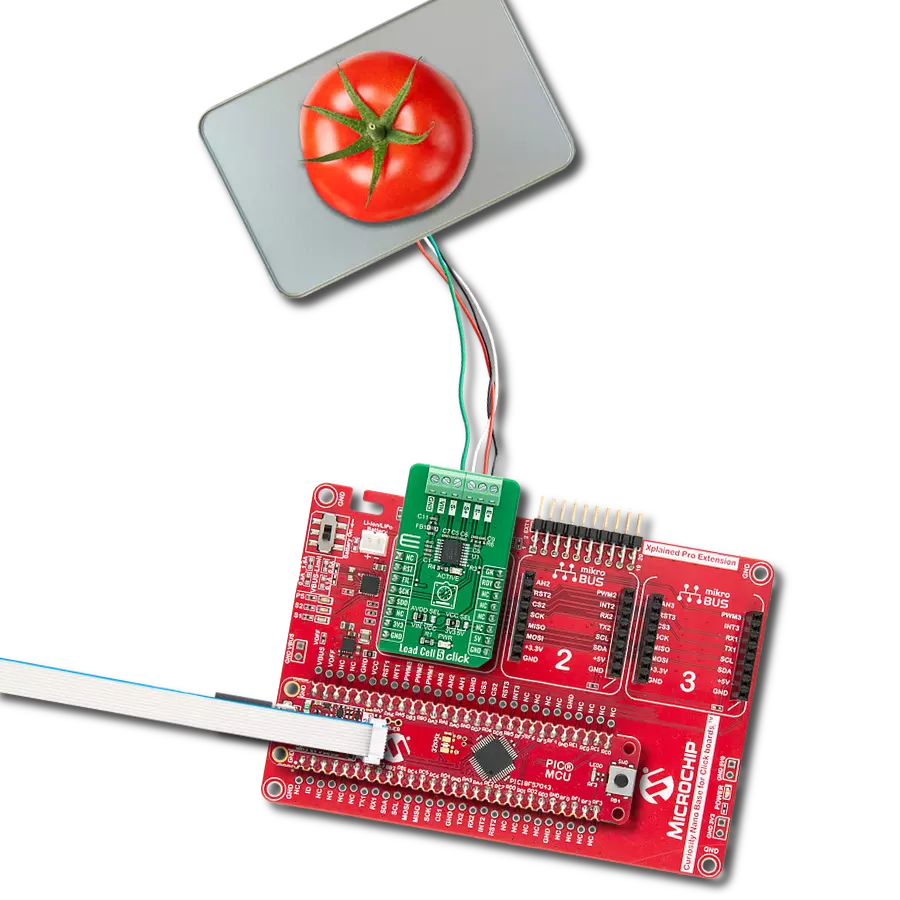
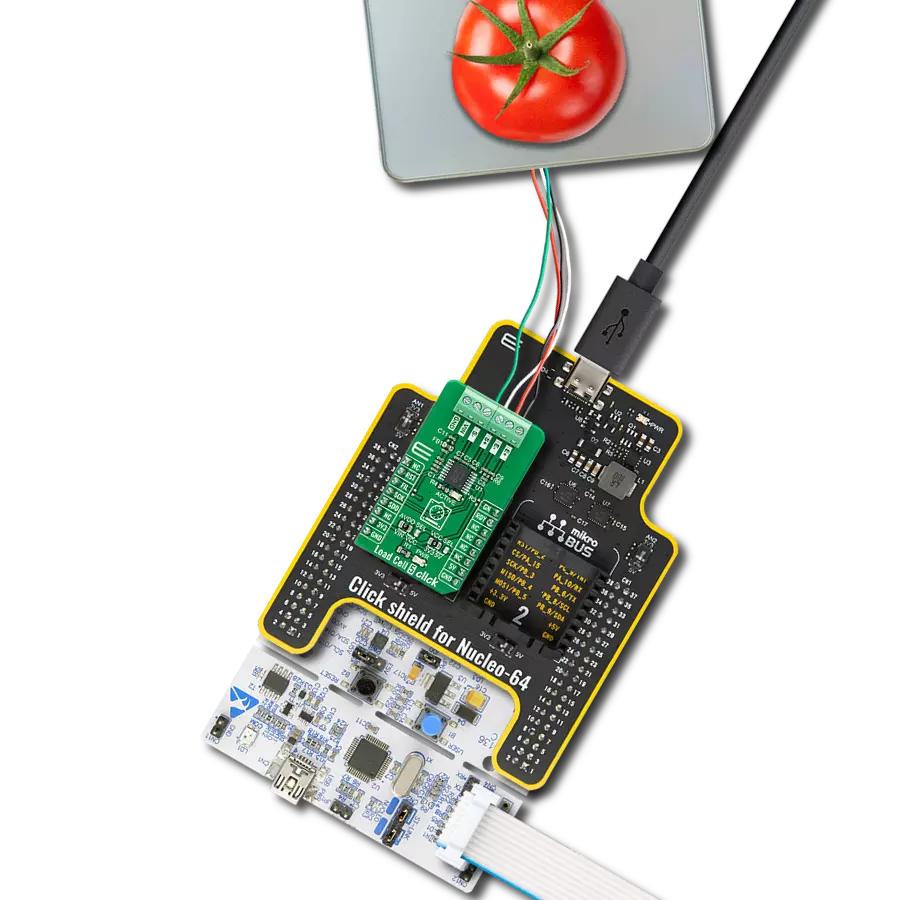
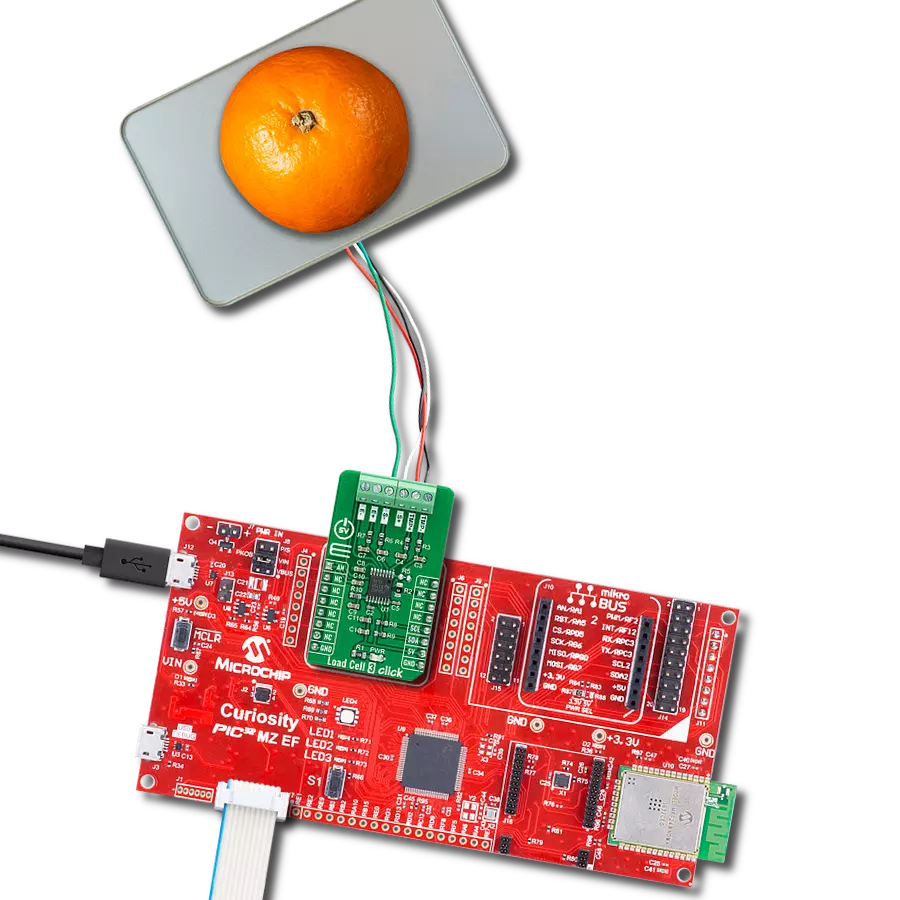
Load Cell 3 Click基于PGA302,这是德州仪器的一款高精度、低漂移、低噪声、低功耗和多功能信号调理器,经过汽车级认证,适用于电阻式桥式压力和温度感应应用。PGA302提供2.5V的桥式激励电压。PGA302通过放大和数字化信号,并通过模拟前端链进行线性化和温度补偿来对感应和温度信号进行处理。处理后的信号可以以模拟形式输出,此外,信号数据还可以通过I2C数字接口访问。PGA302包含两
个独立的模拟前端(AFE)链,用于电阻式桥式和温度感应输入的增益放大器。电阻式桥式输入AFE链包括一个可编程增益,具有从1.33V/V到200V/V的八个步骤。对于温度感应输入AFE链,PGA302提供高达1mA的电流源,可用于板载标记为TMP+和TMP-的可选外部温度感应。在ADC降采样滤波器之后,数字化信号被发送到线性化和补偿计算数字信号逻辑。所有线性化算法和其他用户数据所需的参数都存储在集成的EEPROM
存储器中。在器件的输出端,有一个14位DAC,后面跟着一个比例电压供应输出缓冲器,增益为4 V/V,允许在mikroBUS™插座上的AN引脚上提供0-5V的比例电压系统输出。这个Click board™只能使用5V逻辑电压电平操作。在使用不同逻辑电平的MCU之前,板上必须进行适当的逻辑电压电平转换。此外,它配备了一个包含函数和示例代码的库,可用作进一步开发的参考。


功能概述
开发板
Curiosity PIC32 MZ EF 开发板是一个完全集成的 32 位开发平台,特点是高性能的 PIC32MZ EF 系列(PIC32MZ2048EFM),该系列具有 2MB Flash、512KB RAM、集成的浮点单元(FPU)、加密加速器和出色的连接选项。它包括一个集成的程序员和调试器,无需额外硬件。用户可以通过 MIKROE
mikroBUS™ Click™ 适配器板扩展功能,通过 Microchip PHY 女儿板添加以太网连接功能,使用 Microchip 扩展板添加 WiFi 连接能力,并通过 Microchip 音频女儿板添加音频输入和输出功能。这些板完全集成到 PIC32 强大的软件框架 MPLAB Harmony 中,该框架提供了一个灵活且模块化的接口
来应用开发、一套丰富的互操作软件堆栈(TCP-IP、USB)和易于使用的功能。Curiosity PIC32 MZ EF 开发板提供了扩展能力,使其成为连接性、物联网和通用应用中快速原型设计的绝佳选择。

微控制器概述
MCU卡片 / MCU

建筑
PIC32
MCU 内存 (KB)
2048
硅供应商
Microchip
引脚数
100
RAM (字节)
524288
使用的MCU引脚
mikroBUS™映射器
“仔细看看!”
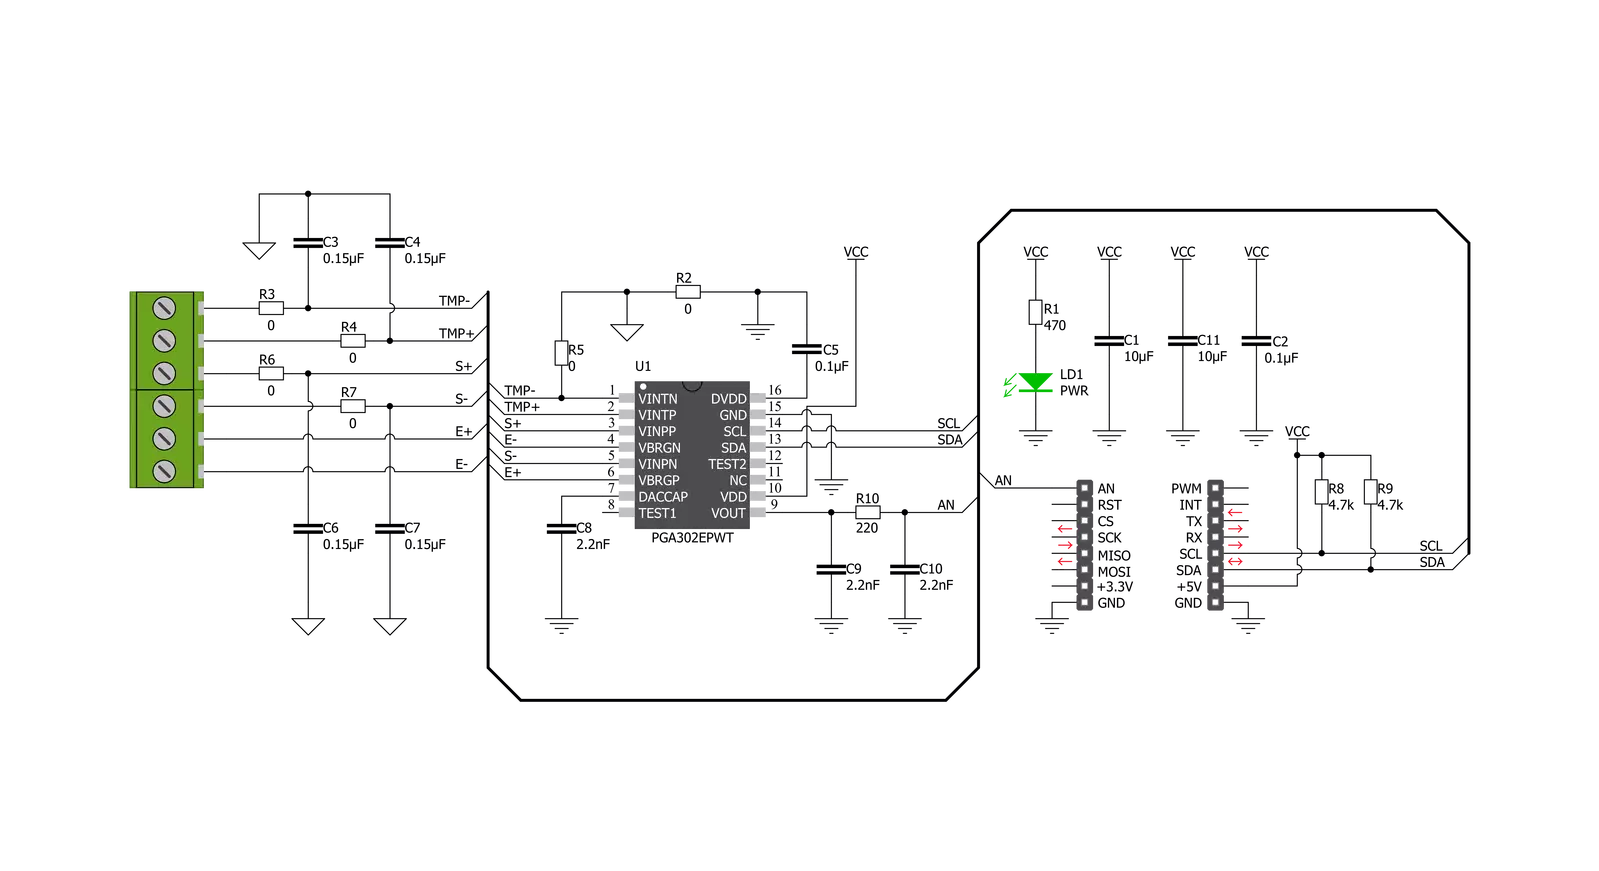
Click board™ 原理图
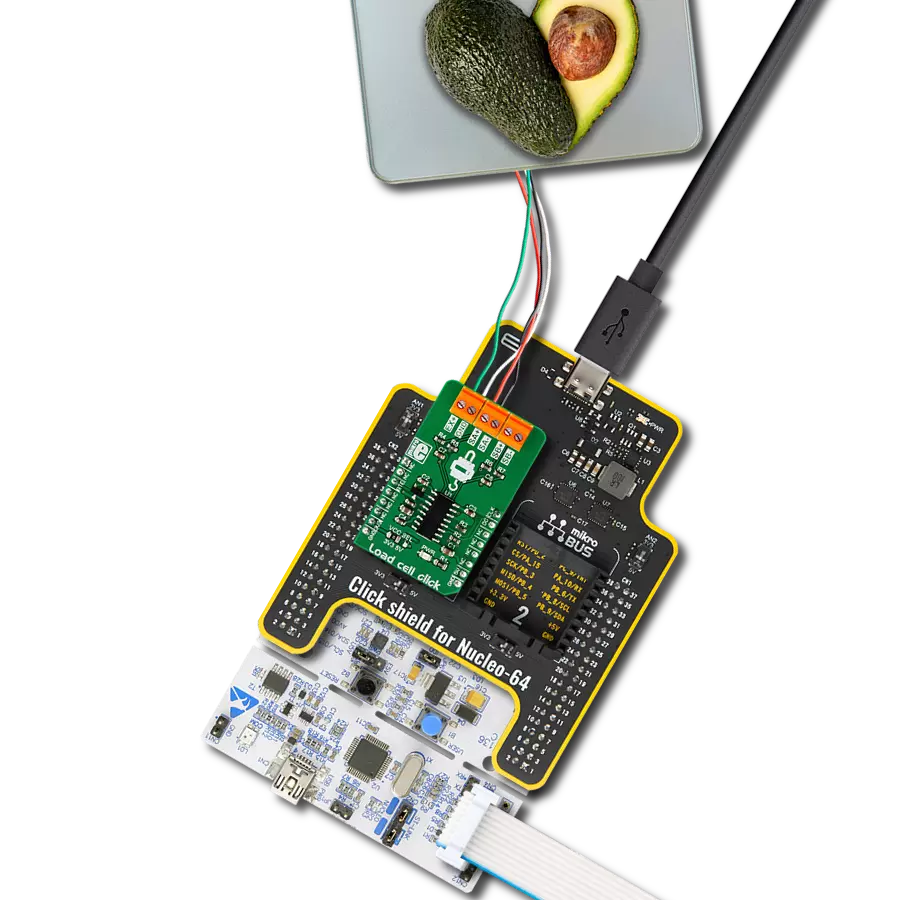
一步一步来
项目组装

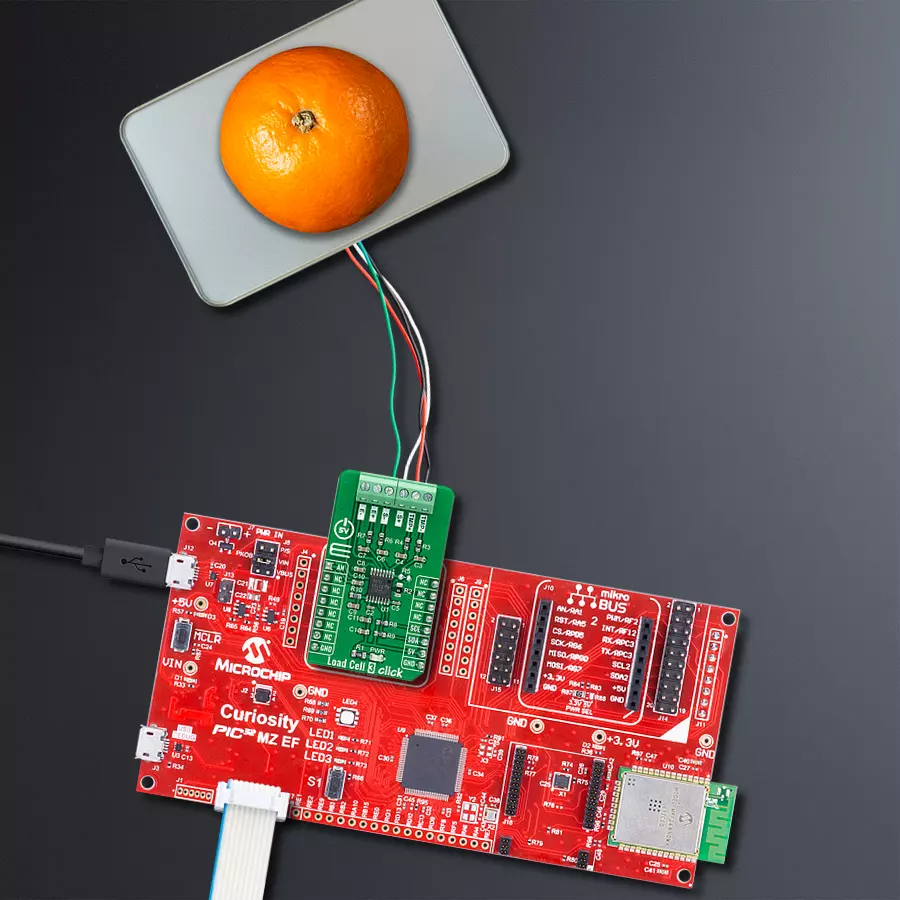
从选择您的开发板和Click板™开始。以Curiosity PIC32 MZ EF作为您的开发板开始。


软件支持
库描述
该库包含 Load Cell 3 Click 驱动程序的 API。
关键功能:
loadcell3_tare- 秤重功能,对称重传感器3进行皮重处理loadcell3_calibration- 秤重传感器3的校准功能loadcell3_get_weight- 秤重传感器3获取重量功能
开源
代码示例
完整的应用程序代码和一个现成的项目可以通过NECTO Studio包管理器直接安装到NECTO Studio。 应用程序代码也可以在MIKROE的GitHub账户中找到。
/*!
 * @file main.c
 * @brief LoadCell3 Click example
 *
 * # Description
 * This library contains API for the Load Cell 3 Click driver.
 * The library also includes a function for tare and calibration and weight measurement.
 * This demo application shows an example of weight measurement.
 *
 * The demo application is composed of two sections :
 *
 * ## Application Init
 * Initialization of I2C module and log UART.
 * After driver initialization and default settings, the app sets tare the scale,
 * calibrate scale and start measurements.
 *
 * ## Application Task
 * This is an example that shows the use of a Load Cell 3 Click board™.
 * The Load Cell 3 Click board can be used to measure weight,
 * shows the measurement of scales in grams [ g ].
 * Results are being sent to the Usart Terminal where you can track their changes.
 *
 * @author Nenad Filipovic
 *
 */

#include "board.h"
#include "log.h"
#include "loadcell3.h"

static loadcell3_t loadcell3;
static log_t logger;

static loadcell3_data_t cell_data;
static float weight_val;

void application_init ( void ) {
    log_cfg_t log_cfg;              /**< Logger config object. */
    loadcell3_cfg_t loadcell3_cfg;  /**< Click config object. */

    /**
     * Logger initialization.
     * Default baud rate: 115200
     * Default log level: LOG_LEVEL_DEBUG
     * @note If USB_UART_RX and USB_UART_TX
     * are defined as HAL_PIN_NC, you will
     * need to define them manually for log to work.
     * See @b LOG_MAP_USB_UART macro definition for detailed explanation.
     */
    LOG_MAP_USB_UART( log_cfg );
    log_init( &logger, &log_cfg );
    log_info( &logger, " Application Init " );

    // Click initialization.

    loadcell3_cfg_setup( &loadcell3_cfg );
    LOADCELL3_MAP_MIKROBUS( loadcell3_cfg, MIKROBUS_1 );
    err_t init_flag = loadcell3_init( &loadcell3, &loadcell3_cfg );
    if ( init_flag == I2C_MASTER_ERROR ) {
        log_error( &logger, " Application Init Error. " );
        log_info( &logger, " Please, run program again... " );

        for ( ; ; );
    }

    loadcell3_default_cfg ( &loadcell3 );
    log_info( &logger, " Application Task " );
    Delay_ms ( 100 );

    log_printf( &logger, "-------------------------\r\n" );
    log_printf( &logger, "     Tare the scale :    \r\n" );
    log_printf( &logger, "- - - - - - - - - - - - -\r\n" );
    log_printf( &logger, " >> Remove all object << \r\n" );
    log_printf( &logger, "- - - - - - - - - - - - -\r\n" );
    log_printf( &logger, " In the following 10 sec \r\n" );
    log_printf( &logger, " please remove all object\r\n" );
    log_printf( &logger, "     from the scale.     \r\n" );
    // 10 seconds delay
    Delay_ms ( 1000 );
    Delay_ms ( 1000 );
    Delay_ms ( 1000 );
    Delay_ms ( 1000 );
    Delay_ms ( 1000 );
    Delay_ms ( 1000 );
    Delay_ms ( 1000 );
    Delay_ms ( 1000 );
    Delay_ms ( 1000 );
    Delay_ms ( 1000 );

    log_printf( &logger, "-------------------------\r\n" );
    log_printf( &logger, "    Start tare scales    \r\n" );
    loadcell3_tare ( &loadcell3, &cell_data );
    Delay_ms ( 500 );

    log_printf( &logger, "-------------------------\r\n" );
    log_printf( &logger, "   Tarring is complete   \r\n" );
    log_printf( &logger, "-------------------------\r\n" );
    log_printf( &logger, "    Calibrate Scale :    \r\n" );
    log_printf( &logger, "- - - - - - - - - - - - -\r\n" );
    log_printf( &logger, "   >>> Load etalon <<<   \r\n" );
    log_printf( &logger, "- - - - - - - - - - - - -\r\n" );
    log_printf( &logger, " In the following 10 sec \r\n" );
    log_printf( &logger, "place 100g weight etalon \r\n" );
    log_printf( &logger, "    on the scale for     \r\n" );
    log_printf( &logger, "   calibration purpose.  \r\n" );
    // 10 seconds delay
    Delay_ms ( 1000 );
    Delay_ms ( 1000 );
    Delay_ms ( 1000 );
    Delay_ms ( 1000 );
    Delay_ms ( 1000 );
    Delay_ms ( 1000 );
    Delay_ms ( 1000 );
    Delay_ms ( 1000 );
    Delay_ms ( 1000 );
    Delay_ms ( 1000 );

    log_printf( &logger, "-------------------------\r\n" );
    log_printf( &logger, "    Start calibration    \r\n" );

    if ( loadcell3_calibration ( &loadcell3, LOADCELL3_WEIGHT_100G, &cell_data ) == LOADCELL3_OK ) {
        log_printf( &logger, "-------------------------\r\n" );
        log_printf( &logger, "    Calibration  Done    \r\n" );

        log_printf( &logger, "- - - - - - - - - - - - -\r\n" );
        log_printf( &logger, "  >>> Remove etalon <<<  \r\n" );
        log_printf( &logger, "- - - - - - - - - - - - -\r\n" );
        log_printf( &logger, " In the following 10 sec \r\n" );
        log_printf( &logger, "   remove 100g weight    \r\n" );
        log_printf( &logger, "   etalon on the scale.  \r\n" );
        // 10 seconds delay
        Delay_ms ( 1000 );
        Delay_ms ( 1000 );
        Delay_ms ( 1000 );
        Delay_ms ( 1000 );
        Delay_ms ( 1000 );
        Delay_ms ( 1000 );
        Delay_ms ( 1000 );
        Delay_ms ( 1000 );
        Delay_ms ( 1000 );
        Delay_ms ( 1000 );
    }
    else {
        log_printf( &logger, "-------------------------\r\n" );
        log_printf( &logger, "   Calibration  Error    \r\n" );
        for ( ; ; );
    }

    log_printf( &logger, "-------------------------\r\n" );
    log_printf( &logger, "   Start measurements :  \r\n" );
    log_printf( &logger, "-------------------------\r\n" );
}

void application_task ( void ) {
    weight_val = loadcell3_get_weight( &loadcell3, &cell_data );
    log_printf( &logger, "   Weight : %.2f g\r\n", weight_val );
    Delay_ms ( 1000 );
}

int main ( void )
{
    /* Do not remove this line or clock might not be set correctly. */
    #ifdef PREINIT_SUPPORTED
    preinit();
    #endif

    application_init( );

    for ( ; ; )
    {
        application_task( );
    }

    return 0;
}

// ------------------------------------------------------------------------ END
额外支持
资源
类别:力