Elevate your Bluetooth audio experience with BM83 and PIC32MZ2048EFH100
Immerse in pure audio bliss

Published Jul 29, 2023
Click board™
BT Audio 3 Click
Dev. board
Flip&Click PIC32MZ
Compiler
NECTO Studio
MCU
PIC32MZ2048EFH100
Fully certified BT 5.0 stereo audio solution with voice and audio post-processing capability for Bluetooth audio applications
A
A
Hardware Overview
How does it work?
BT Audio 3 Click is based on the BM83 SoC, a fully certified Bluetooth v5.0 stereo audio module with high-performing voice and audio post-processing capability for Bluetooth audio applications from Microchip. Based on an onboard Bluetooth stack and audio profile design, the module supports 24-bit/96kHz audio. Integrated IS2083 dual-mode audio IC features Digital Signal Processor (DSP) that decodes AAC and SBC codecs and executes advanced audio and voice processing, such as Wide-Band (WB) speech Acoustic Echo Cancellation (AEC) and Noise Reduction (NR). More information on the many features and characteristics of the module itself can be found on the official website of the Microchip BM83 module. The BM83 module provides an I2S digital audio interface configured in Master mode to connect with the external DSP, the AK4430. In this mode, the BM83 serves as a master to provide clock and frame synchronous signals for the master/slave data synchronizations. The master clock output is delivered to an external I2S device (AK4430) to drive its system clock and save crystal costs. The BM83 module receives audio from the smartphone via its PCB antenna and then forwards it to an external speaker via the AK4430,
connected to the LINE OUT connector. The AK4430 supports Mute operation accessible through the SM pin routed to the AN pin on the mikroBUS™ socket and two audio data interface formats, MSB-first or I2S format, selectable via SMD jumper labeled as OUT SET, by positioning it to an appropriate position marked as 1 or 0. This Click board™ also has an onboard digital MEMS microphone, the SPH0641LU4H-1, populated on the bottom side of the board. The MEMS microphone enables an expansive sound range from audible frequency to ultrasonic (100Hz - 80kHz). Even though it is placed on the bottom side, with the help of the top side opening marked with MIC, an uninterrupted flow of sound to the microphone is enabled. Also, microphone data processing selection via SMD jumper labeled as MIC SEL is possible by positioning it to an appropriate position marked as 1 or 0, on which clock edge data will be asserted or latched. The BM83 communicates with MCU using the UART interface with commonly used UART RX and TX pins. It operates at 115200 bps by default configuration to transmit and exchange data with the host MCU. In addition to interface pins, this Click board™ also uses a Reset pin, RST pin on the
mikroBUS™ socket, MOD pin routed to the INT pin of the mikroBUS™ socket used to enter Test Mode during reset, and MFB pin routed to the PWM pin of the mikroBUS™ socket used for BM83 Wake-Up feature. Also, this Click board™ comes with several audio control buttons, such as volume up/down, rewind/forward, play/pause, and one multifunction button, as well as with two additional LED indicators, blue and red LEDs labeled LED1 and LED2 used for optional user-configurable visual indication. Even though this board uses both mikroBUS ™ power rails, this Click board ™ can only be operated with a 3.3V logic voltage level, selectable through a VBAT SEL jumper, which allows power supply by 3V3 or external battery. 5V is only used for the internal adapter to charge the battery in battery-powered applications. The board must perform appropriate logic voltage level conversion before using MCUs with different logic levels. However, the Click board ™ equipped comes equipped with a library containing functions and an example code that can be used, as a reference, for further development.

Features overview
Development board
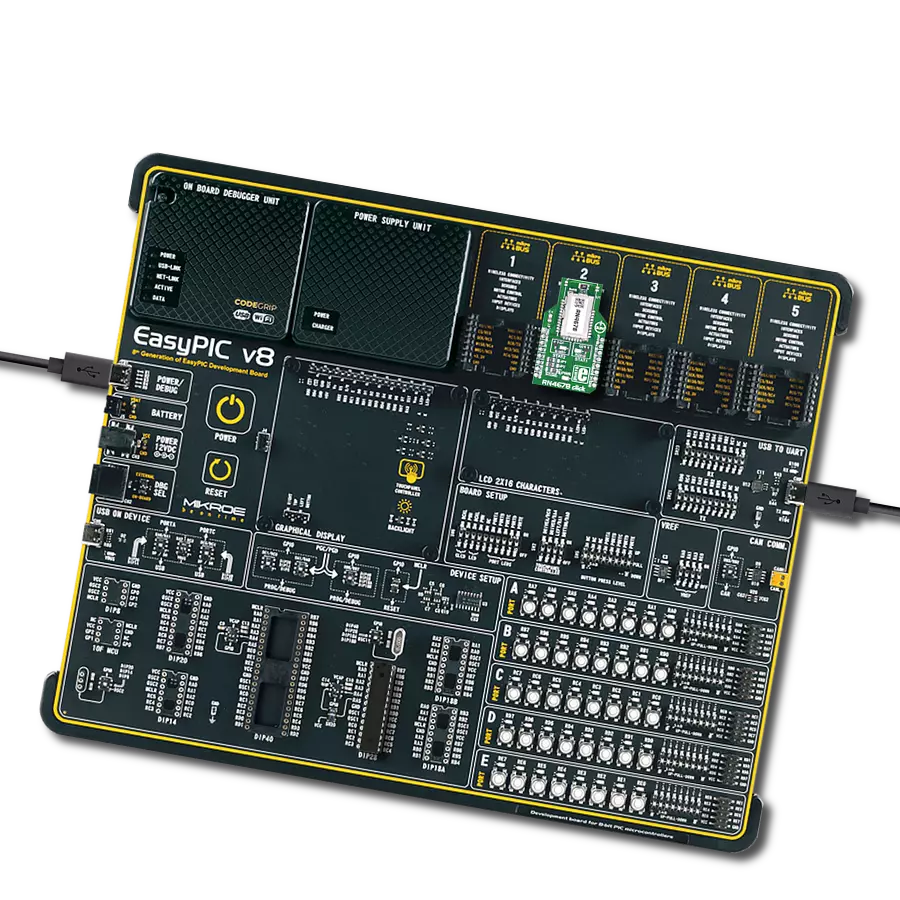
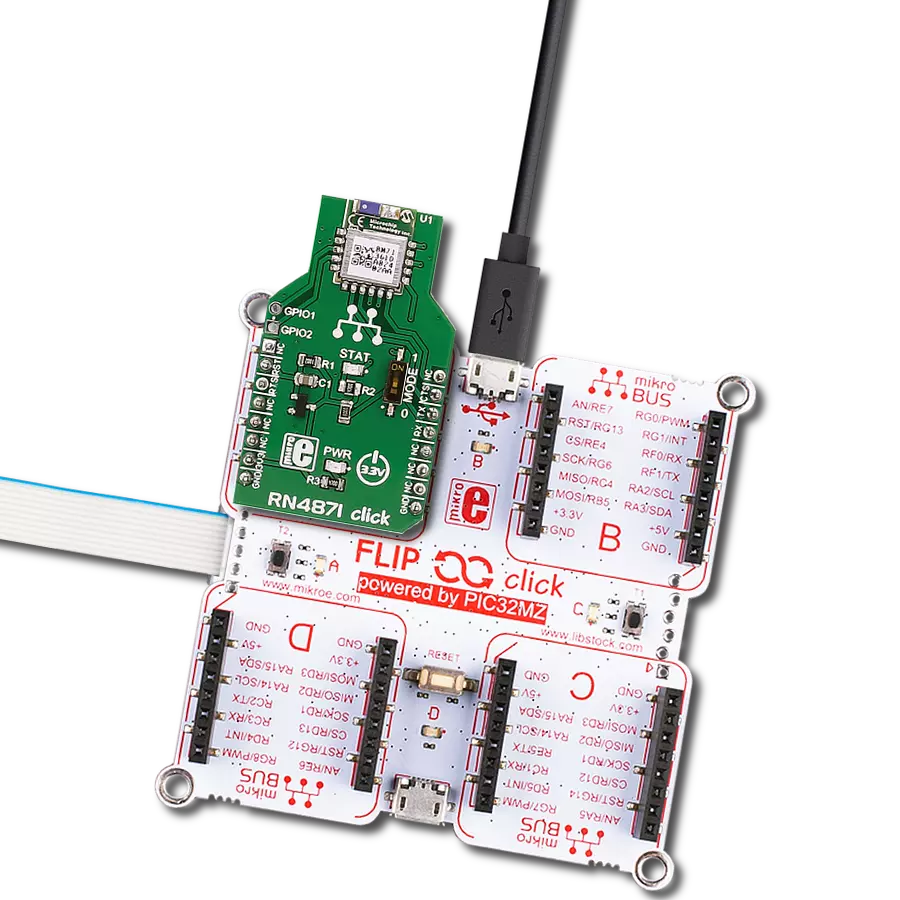
Flip&Click PIC32MZ is a compact development board designed as a complete solution that brings the flexibility of add-on Click boards™ to your favorite microcontroller, making it a perfect starter kit for implementing your ideas. It comes with an onboard 32-bit PIC32MZ microcontroller, the PIC32MZ2048EFH100 from Microchip, four mikroBUS™ sockets for Click board™ connectivity, two USB connectors, LED indicators, buttons, debugger/programmer connectors, and two headers compatible with Arduino-UNO pinout. Thanks to innovative manufacturing technology,
it allows you to build gadgets with unique functionalities and features quickly. Each part of the Flip&Click PIC32MZ development kit contains the components necessary for the most efficient operation of the same board. In addition, there is the possibility of choosing the Flip&Click PIC32MZ programming method, using the chipKIT bootloader (Arduino-style development environment) or our USB HID bootloader using mikroC, mikroBasic, and mikroPascal for PIC32. This kit includes a clean and regulated power supply block through the USB Type-C (USB-C) connector. All communication
methods that mikroBUS™ itself supports are on this board, including the well-established mikroBUS™ socket, user-configurable buttons, and LED indicators. Flip&Click PIC32MZ development kit allows you to create a new application in minutes. Natively supported by Mikroe software tools, it covers many aspects of prototyping thanks to a considerable number of different Click boards™ (over a thousand boards), the number of which is growing every day.

Microcontroller Overview
MCU Card / MCU

Architecture
PIC32
MCU Memory (KB)
2048
Silicon Vendor
Microchip
Pin count
100
RAM (Bytes)
524288
You complete me!
Accessories
These standard small stereo earphones offer a high-quality listening experience with their top-notch stereo cable and connector. Designed for universal compatibility, they effortlessly connect to all MIKROE mikromedia and multimedia boards, making them an ideal choice for your electronic projects. With a rated power of 100mW, the earphones provide crisp audio across a broad frequency range from 20Hz to 20kHz. They boast a sensitivity of 100 ± 5dB and an impedance of 32Ω ± 15%, ensuring optimal sound quality. The Φ15mm speaker delivers clear and immersive audio. Cost-effective and versatile, these earphones are perfect for testing your prototype devices, offering an affordable and reliable audio solution to complement your projects.

Used MCU Pins
mikroBUS™ mapper
Take a closer look
Click board™ Schematic

Step by step
Project assembly

Start by selecting your development board and Click board™. Begin with the Flip&Click PIC32MZ as your development board.


Track your results in real time
Application Output
1. Application Output - In Debug mode, the 'Application Output' window enables real-time data monitoring, offering direct insight into execution results. Ensure proper data display by configuring the environment correctly using the provided tutorial.

2. UART Terminal - Use the UART Terminal to monitor data transmission via a USB to UART converter, allowing direct communication between the Click board™ and your development system. Configure the baud rate and other serial settings according to your project's requirements to ensure proper functionality. For step-by-step setup instructions, refer to the provided tutorial.

3. Plot Output - The Plot feature offers a powerful way to visualize real-time sensor data, enabling trend analysis, debugging, and comparison of multiple data points. To set it up correctly, follow the provided tutorial, which includes a step-by-step example of using the Plot feature to display Click board™ readings. To use the Plot feature in your code, use the function: plot(*insert_graph_name*, variable_name);. This is a general format, and it is up to the user to replace 'insert_graph_name' with the actual graph name and 'variable_name' with the parameter to be displayed.

Software Support
Library Description
This library contains API for BT Audio 3 Click driver.
Key functions:
btaudio3_set_device_name- This function sets the local device namebtaudio3_music_control- This function sends a music control command with a desired actionbtaudio3_set_eq_mode- This function sets the equalizer mode
Open Source
Code example
The complete application code and a ready-to-use project are available through the NECTO Studio Package Manager for direct installation in the NECTO Studio. The application code can also be found on the MIKROE GitHub account.
/*!
* @file main.c
* @brief BT Audio 3 Click Example.
*
* # Description
* This example demonstrates the use of BT Audio 3 Click board by reading the commands
* received from remote device and performing adequate actions accordingly.
*
* The demo application is composed of two sections :
*
* ## Application Init
* Initializes the driver and configures the Click board.
*
* ## Application Task
* Reads all the received events and parses them.
*
* ## Additional Function
* - static err_t btaudio3_event_handler ( btaudio3_t *ctx ) - This function handles SPP data event
* and several BTM state events added in. The other events will just be displayed on the USB UART in hex format.
*
* @note
* We have used the Serial Bluetooth Terminal smartphone application for the test.
* A smartphone and the Click board must be paired in order to exchange messages
* with each other. So make sure to pair your device with the Click board and
* connect it to using the Serial Bluetooth Terminal application, then you will be able
* to send commands listed below.
*
* @author Stefan Filipovic
*
*/
#include "board.h"
#include "log.h"
#include "btaudio3.h"
static btaudio3_t btaudio3;
static log_t logger;
// Bluetooth device name
#define DEVICE_NAME "BT Audio 3 Click"
// SPP Commands list
#define COMMAND_PLAY "play" // play music
#define COMMAND_PAUSE "pause" // pause music
#define COMMAND_STOP "stop" // stop music
#define COMMAND_NEXT "next" // next song
#define COMMAND_PREVIOUS "prev" // previous song
#define COMMAND_VOLUME_UP "up" // volume up
#define COMMAND_VOLUME_DOWN "down" // volume down
#define COMMAND_UNMUTE "unmute" // unmute output
#define COMMAND_MUTE "mute" // mute output
#define COMMAND_MODE_UP "mode" // switch equalizer mode
#define COMMAND_CALL "call" // call command followed by the nuber
#define COMMAND_VOICE "voice" // start voice recognition app
/**
* @brief BT Audio 3 event handler function.
* @details This function handles SPP data event and several BTM state events added in.
* The other events will just be displayed on the USB UART in hex format.
* @param[in] ctx : Click context object.
* See #btaudio3_t object definition for detailed explanation.
* @return @li @c >=0 - Command ACK event response,
* @li @c -1 - Error.
*
* See #err_t definition for detailed explanation.
* @note None.
*/
static err_t btaudio3_event_handler ( btaudio3_t *ctx );
void application_init ( void )
{
log_cfg_t log_cfg; /**< Logger config object. */
btaudio3_cfg_t btaudio3_cfg; /**< Click config object. */
/**
* Logger initialization.
* Default baud rate: 115200
* Default log level: LOG_LEVEL_DEBUG
* @note If USB_UART_RX and USB_UART_TX
* are defined as HAL_PIN_NC, you will
* need to define them manually for log to work.
* See @b LOG_MAP_USB_UART macro definition for detailed explanation.
*/
LOG_MAP_USB_UART( log_cfg );
log_init( &logger, &log_cfg );
log_info( &logger, " Application Init " );
// Click initialization.
btaudio3_cfg_setup( &btaudio3_cfg );
BTAUDIO3_MAP_MIKROBUS( btaudio3_cfg, MIKROBUS_1 );
if ( UART_ERROR == btaudio3_init( &btaudio3, &btaudio3_cfg ) )
{
log_error( &logger, " Communication init." );
for ( ; ; );
}
if ( BTAUDIO3_OK != btaudio3_default_cfg ( &btaudio3 ) )
{
log_error( &logger, " Default configuration." );
for ( ; ; );
}
if ( BTAUDIO3_OK != btaudio3_set_device_name ( &btaudio3, DEVICE_NAME ) )
{
log_error( &logger, " Set device name." );
for ( ; ; );
}
log_info( &logger, " Application Task " );
}
void application_task ( void )
{
if ( BTAUDIO3_OK == btaudio3_read_event ( &btaudio3 ) )
{
btaudio3_event_handler ( &btaudio3 );
}
}
int main ( void )
{
/* Do not remove this line or clock might not be set correctly. */
#ifdef PREINIT_SUPPORTED
preinit();
#endif
application_init( );
for ( ; ; )
{
application_task( );
}
return 0;
}
static err_t btaudio3_event_handler ( btaudio3_t *ctx )
{
err_t error_flag = BTAUDIO3_OK;
static btaudio3_eq_mode_t eq_mode = BTAUDIO2_EQ_MODE_OFF;
switch ( ctx->event_packet.opcode )
{
case BTAUDIO3_EVT_REPORT_SPP_DATA:
{
if ( 0 == ctx->event_packet.param_buf[ 1 ] ) // single packet
{
uint16_t payload_len = ( ( uint16_t ) ctx->event_packet.param_buf[ 4 ] << 8 ) |
ctx->event_packet.param_buf[ 5 ];
if ( strstr ( &ctx->event_packet.param_buf[ 6 ], COMMAND_PLAY ) )
{
error_flag |= btaudio3_music_control ( &btaudio3, BTAUDIO3_PLAY );
log_printf( &logger, " > play music\r\n\n" );
}
else if ( strstr ( &ctx->event_packet.param_buf[ 6 ], COMMAND_PAUSE ) )
{
error_flag |= btaudio3_music_control ( &btaudio3, BTAUDIO3_PAUSE );
log_printf( &logger, " > pause music\r\n\n" );
}
else if ( strstr ( &ctx->event_packet.param_buf[ 6 ], COMMAND_STOP ) )
{
error_flag |= btaudio3_music_control ( &btaudio3, BTAUDIO3_STOP );
log_printf( &logger, " > stop music\r\n\n" );
}
else if ( strstr ( &ctx->event_packet.param_buf[ 6 ], COMMAND_NEXT ) )
{
error_flag |= btaudio3_music_control ( &btaudio3, BTAUDIO3_NEXT_SONG );
log_printf( &logger, " > next song\r\n\n" );
}
else if ( strstr ( &ctx->event_packet.param_buf[ 6 ], COMMAND_PREVIOUS ) )
{
error_flag |= btaudio3_music_control ( &btaudio3, BTAUDIO3_PREVIOUS_SONG );
log_printf( &logger, " > previous song\r\n\n" );
}
else if ( strstr ( &ctx->event_packet.param_buf[ 6 ], COMMAND_VOLUME_UP ) )
{
error_flag |= btaudio3_volume_up ( &btaudio3, 0, BTAUDIO3_VOLUME_MASK_A2DP );
log_printf( &logger, " > volume up\r\n\n" );
}
else if ( strstr ( &ctx->event_packet.param_buf[ 6 ], COMMAND_VOLUME_DOWN ) )
{
error_flag |= btaudio3_volume_down ( &btaudio3, 0, BTAUDIO3_VOLUME_MASK_A2DP );
log_printf( &logger, " > volume down\r\n\n" );
}
else if ( strstr ( &ctx->event_packet.param_buf[ 6 ], COMMAND_UNMUTE ) )
{
btaudio3_soft_unmute_output ( &btaudio3 );
log_printf( &logger, " > unmute output\r\n\n" );
}
else if ( strstr ( &ctx->event_packet.param_buf[ 6 ], COMMAND_MUTE ) )
{
btaudio3_soft_mute_output ( &btaudio3 );
log_printf( &logger, " > mute output\r\n\n" );
}
else if ( strstr ( &ctx->event_packet.param_buf[ 6 ], COMMAND_CALL ) )
{
uint8_t phone_number[ 19 ] = { 0 };
memcpy ( phone_number, strstr ( &ctx->event_packet.param_buf[ 6 ], COMMAND_CALL ) + 5, payload_len - 7 );
error_flag |= btaudio3_make_call ( &btaudio3, 0x00, phone_number );
log_printf( &logger, " > calling number: %s\r\n\n", phone_number );
}
else if ( strstr ( &ctx->event_packet.param_buf[ 6 ], COMMAND_VOICE ) )
{
error_flag |= btaudio3_send_mmi_action ( ctx, 0, BTAUDIO3_MMI_VOICE_DIAL );
log_printf( &logger, " > start voice recognition\r\n\n" );
}
else if ( strstr ( &ctx->event_packet.param_buf[ 6 ], COMMAND_MODE_UP ) )
{
if ( BTAUDIO2_EQ_MODE_USER1 == eq_mode )
{
eq_mode = BTAUDIO2_EQ_MODE_OFF;
}
else
{
eq_mode++;
}
btaudio3_set_eq_mode ( &btaudio3, eq_mode );
log_printf( &logger, " > equalizer mode: " );
switch ( eq_mode )
{
case BTAUDIO2_EQ_MODE_OFF:
{
log_printf( &logger, "off\r\n\n" );
break;
}
case BTAUDIO2_EQ_MODE_SOFT:
{
log_printf( &logger, "soft\r\n\n" );
break;
}
case BTAUDIO2_EQ_MODE_BASS:
{
log_printf( &logger, "bass\r\n\n" );
break;
}
case BTAUDIO2_EQ_MODE_TREBLE:
{
log_printf( &logger, "treble\r\n\n" );
break;
}
case BTAUDIO2_EQ_MODE_CLASSIC:
{
log_printf( &logger, "classic\r\n\n" );
break;
}
case BTAUDIO2_EQ_MODE_ROCK:
{
log_printf( &logger, "rock\r\n\n" );
break;
}
case BTAUDIO2_EQ_MODE_JAZZ:
{
log_printf( &logger, "jazz\r\n\n" );
break;
}
case BTAUDIO2_EQ_MODE_POP:
{
log_printf( &logger, "pop\r\n\n" );
break;
}
case BTAUDIO2_EQ_MODE_DANCE:
{
log_printf( &logger, "dance\r\n\n" );
break;
}
case BTAUDIO2_EQ_MODE_RNB:
{
log_printf( &logger, "rnb\r\n\n" );
break;
}
case BTAUDIO2_EQ_MODE_USER1:
{
log_printf( &logger, "user1\r\n\n" );
break;
}
default:
{
log_printf( &logger, "unknown\r\n\n" );
break;
}
}
}
else
{
log_printf( &logger, " Unknown command: ", &ctx->event_packet.param_buf[ 6 ] );
for ( uint16_t cnt = 0; cnt < payload_len; cnt++ )
{
log_printf( &logger, "%c", ctx->event_packet.param_buf[ cnt + 6 ] );
}
log_printf( &logger, "\r\n\n" );
}
}
break;
}
case BTAUDIO3_EVT_BTM_STATE:
{
switch ( ctx->event_packet.param_buf[ 0 ] )
{
case BTAUDIO3_BTM_STATE_PAIRING_SUCCESSFULL:
{
log_printf( &logger, " < Pairing successfull - linked device ID: %u\r\n\n",
( uint16_t ) ctx->event_packet.param_buf[ 1 ] );
break;
}
case BTAUDIO3_BTM_STATE_SCO_LINK_CONNECTED:
{
log_printf( &logger, " < SCO link connected - linked device ID: %u\r\n\n",
( uint16_t ) ctx->event_packet.param_buf[ 1 ] );
break;
}
case BTAUDIO3_BTM_STATE_SCO_LINK_DISCONNECTED:
{
log_printf( &logger, " < SCO link disconnected - linked device ID: %u\r\n\n",
( uint16_t ) ctx->event_packet.param_buf[ 1 ] );
break;
}
case BTAUDIO3_BTM_STATE_ACL_CONNECTED:
{
log_printf( &logger, " < ACL connected - linked data base: %u\r\n\n",
( uint16_t ) ctx->event_packet.param_buf[ 1 ] );
break;
}
case BTAUDIO3_BTM_STATE_ACL_DISCONNECTED:
{
log_printf( &logger, " < ACL disconnected - " );
if ( 0 == ctx->event_packet.param_buf[ 1 ] )
{
log_printf( &logger, "disconnection\r\n\n" );
}
else if ( 1 == ctx->event_packet.param_buf[ 1 ] )
{
log_printf( &logger, "link loss\r\n\n" );
}
break;
}
case BTAUDIO3_BTM_STATE_STANDBY_STATE:
{
log_printf( &logger, " < Standby state\r\n\n" );
log_printf( &logger, " > ReEnter pairing mode\r\n\n" );
error_flag |= btaudio3_enter_pairing_mode ( &btaudio3 );
break;
}
case BTAUDIO3_BTM_STATE_UNKNOWN_AUDIO_SOURCE:
{
log_printf( &logger, " < Unknown audio source\r\n\n" );
break;
}
case BTAUDIO3_BTM_STATE_AUX_IN_AUDIO_SOURCE:
{
log_printf( &logger, " < AUX-IN audio source\r\n\n" );
break;
}
case BTAUDIO3_BTM_STATE_A2DP_AUDIO_SOURCE:
{
log_printf( &logger, " < A2DP audio source\r\n\n" );
break;
}
default:
{
log_printf( &logger, " < EVENT BTM STATE: " );
for ( uint16_t cnt = 0; cnt < ctx->event_packet.param_len; cnt++ )
{
log_printf( &logger, "0x%.2X ", ( uint16_t ) ctx->event_packet.param_buf[ cnt ] );
}
log_printf( &logger, "\r\n\n" );
break;
}
}
break;
}
default:
{
log_printf( &logger, " < EVENT 0x%.2X: ", ( uint16_t ) ctx->event_packet.opcode );
for ( uint16_t cnt = 0; cnt < ctx->event_packet.param_len; cnt++ )
{
log_printf( &logger, "0x%.2X ", ( uint16_t ) ctx->event_packet.param_buf[ cnt ] );
}
log_printf( &logger, "\r\n\n" );
break;
}
}
return error_flag;
}
// ------------------------------------------------------------------------ END