Gain insight into the invisible forces of magnetism with MLX90393 and PIC18F57Q43
Unraveling the magnetic mysteries

Published Feb 13, 2024
Click board™
Gaussmeter click
Dev. board
Curiosity Nano with PIC18F57Q43
Compiler
NECTO Studio
MCU
PIC18F57Q43
Explore the versatile world of gaussmeters and find out how these portable wonders can transform the way you measure, control, and understand magnetic fields
A
A
Hardware Overview
How does it work?
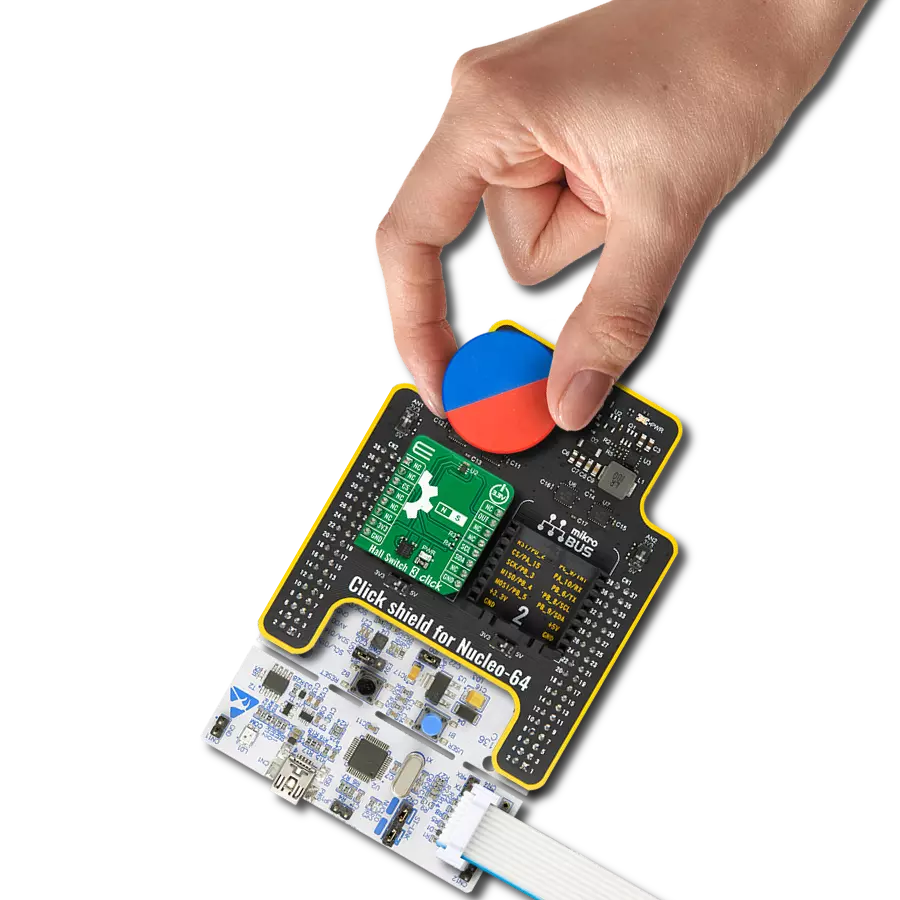
Gaussmeter Click is based on the MLX90393, a micropower magnetometer based on the proprietary Triaxis® technology from Melexis. This IC is based on the Hall effect principle, which allows it to detect very small fluctuations in the magnetic field. The Hall sensor plates, featuring the patented IMC technology, are located in the center of the die, which is located in the center of the package. The measurement current, generated as a result of the Hall effect, is passed through the transimpedance amplifier (TIA) and sampled by the 19-bit A/D converter (ADC). The output is the truncated to 16-bits, by applying the bit-shifting operation, programmed by the user (RES_XYZ bits). This allows the range to be dynamically set, according to measurement conditions, leaving unused MSBs or LSBs out. Additionally, it is possible to set the TIA gain level in the range from 0 to 7 to best match the field strength. The value of the RES bits and the gain level both affect the sensitivity of the sensor. The MLX90393 datasheet contains a table with the RES and GAIN, and corresponding µT/LSB values. When required, it is possible to set the oversampling rate of the ADC decimation filter. This will provide less noise and more consistent readings. However, oversampling affects the data acquisition time, as the sampling process has to be repeated a number of times, depending on the oversampling rate. If the fast response is required, the oversampling and digital filtering functions
should be turned off. The measurement is affected by the temperature. Therefore, the MLX90393 is also equipped with the temperature sensor, used to provide the required measurements. The thermal sensitivity drift compensation can be enabled by the appropriate bit in the configuration register. Two sensitivity drift compensation factors can be used, one for temperatures greater than the reference and other for the temperatures lesser than the reference value. Wakeup on Change (WOC) mode is used to alert the MCU via the interrupt pin when certain conditions are met. It can be configured to trigger an interrupt on the INT pin if the difference between the reference measurement value and the current measurement value exceed a threshold defined by the user. The interrupt is reported on the INT pin of the IC, routed to the INT pin of the mikroBUS™, and/or on the INT/TRIG pin, routed to the mikroBUS™ PWM pin (labeled as TRG), if it is configured that way. The INT/TRIG pin can also be set as the trigger input, by configuring the corresponding bits (TRIG_INT_SEL and EXT_TRIG). These pins are active HIGH. Besides the WOC mode, there is also Burst and Single Measurement modes. Both of these modes can use the INT pin to signalize that there is a conversion data ready to be read. Once the MCU reads the data, the INT/Data Ready event will be cleared. The Burst mode provides data in programmed intervals, while Single Measurement
mode will provide one reading when commanded, signal it via the INT pin and revert to IDLE mode, consuming less power. The MLX90393 sensor contains 1KB of volatile (RAM) memory. This memory is used to store config parameters and register values, but also there are some free locations for storing user information, e.g. compensation values and similar. Besides 1KB of volatile memory, there is also 1KB of non-volatile memory. During the POR, the complete content of the NV memory is automatically copied to the RAM restoring the saved working parameters that way. There are also commands available for the user, in order to store to or restore RAM data from the non-volatile (NV) memory. However, it is not recommended to write to the NV memory area too often, as this type of memory has an inherently limited life cycle. This Click board™ allows both SPI and I2C communication protocols. To select a proper protocol, the SMD jumpers labeled as SEL COM should be moved to the appropriate position (I2C or SPI). Please note that both jumpers need to be at the same setting (both as SPI or both as I2C). The I2C address of the Click board™ is selectable by the onboard SMD jumpers, labeled as I2C ADDR. These two jumpers directly set the values of the LSB address of the IC. The 7-bit address of the device is 00011XXZ, where XX are the values set by these jumpers, while Z is the R/W bit.


Features overview
Development board
PIC18F57Q43 Curiosity Nano evaluation kit is a cutting-edge hardware platform designed to evaluate microcontrollers within the PIC18-Q43 family. Central to its design is the inclusion of the powerful PIC18F57Q43 microcontroller (MCU), offering advanced functionalities and robust performance. Key features of this evaluation kit include a yellow user LED and a responsive
mechanical user switch, providing seamless interaction and testing. The provision for a 32.768kHz crystal footprint ensures precision timing capabilities. With an onboard debugger boasting a green power and status LED, programming and debugging become intuitive and efficient. Further enhancing its utility is the Virtual serial port (CDC) and a debug GPIO channel (DGI
GPIO), offering extensive connectivity options. Powered via USB, this kit boasts an adjustable target voltage feature facilitated by the MIC5353 LDO regulator, ensuring stable operation with an output voltage ranging from 1.8V to 5.1V, with a maximum output current of 500mA, subject to ambient temperature and voltage constraints.

Microcontroller Overview
MCU Card / MCU
Architecture
PIC
MCU Memory (KB)
128
Silicon Vendor
Microchip
Pin count
48
RAM (Bytes)
8196
You complete me!
Accessories
Curiosity Nano Base for Click boards is a versatile hardware extension platform created to streamline the integration between Curiosity Nano kits and extension boards, tailored explicitly for the mikroBUS™-standardized Click boards and Xplained Pro extension boards. This innovative base board (shield) offers seamless connectivity and expansion possibilities, simplifying experimentation and development. Key features include USB power compatibility from the Curiosity Nano kit, alongside an alternative external power input option for enhanced flexibility. The onboard Li-Ion/LiPo charger and management circuit ensure smooth operation for battery-powered applications, simplifying usage and management. Moreover, the base incorporates a fixed 3.3V PSU dedicated to target and mikroBUS™ power rails, alongside a fixed 5.0V boost converter catering to 5V power rails of mikroBUS™ sockets, providing stable power delivery for various connected devices.

Used MCU Pins
mikroBUS™ mapper
Take a closer look
Click board™ Schematic

Step by step
Project assembly

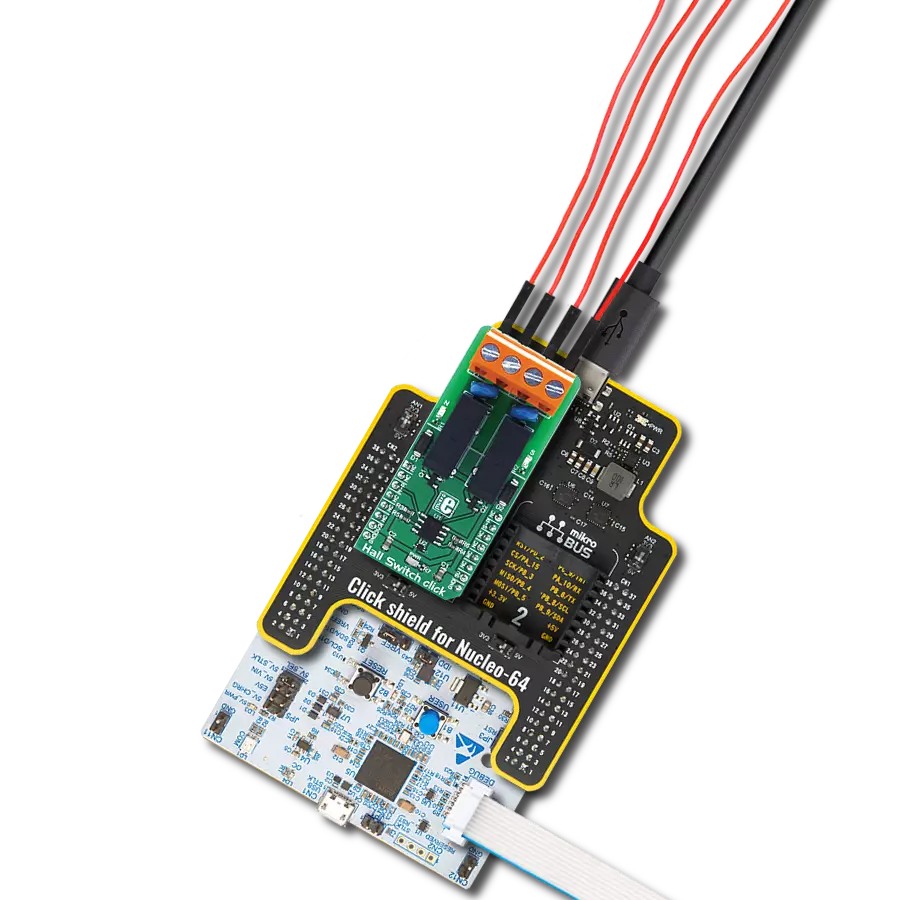
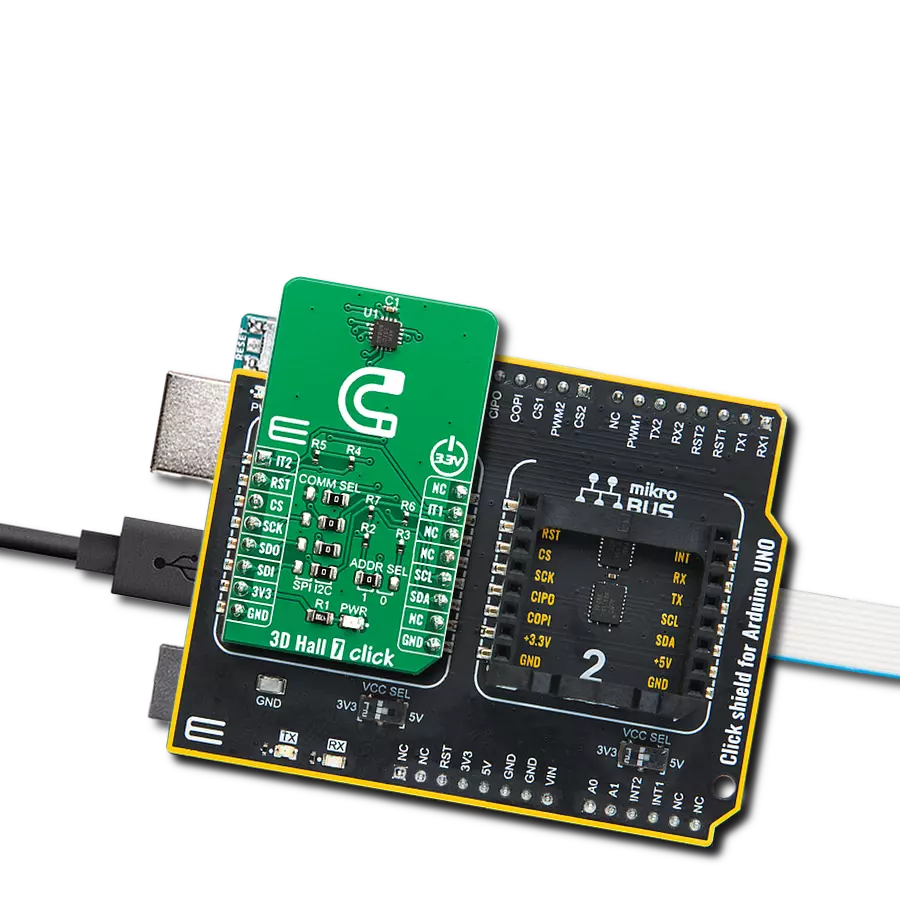
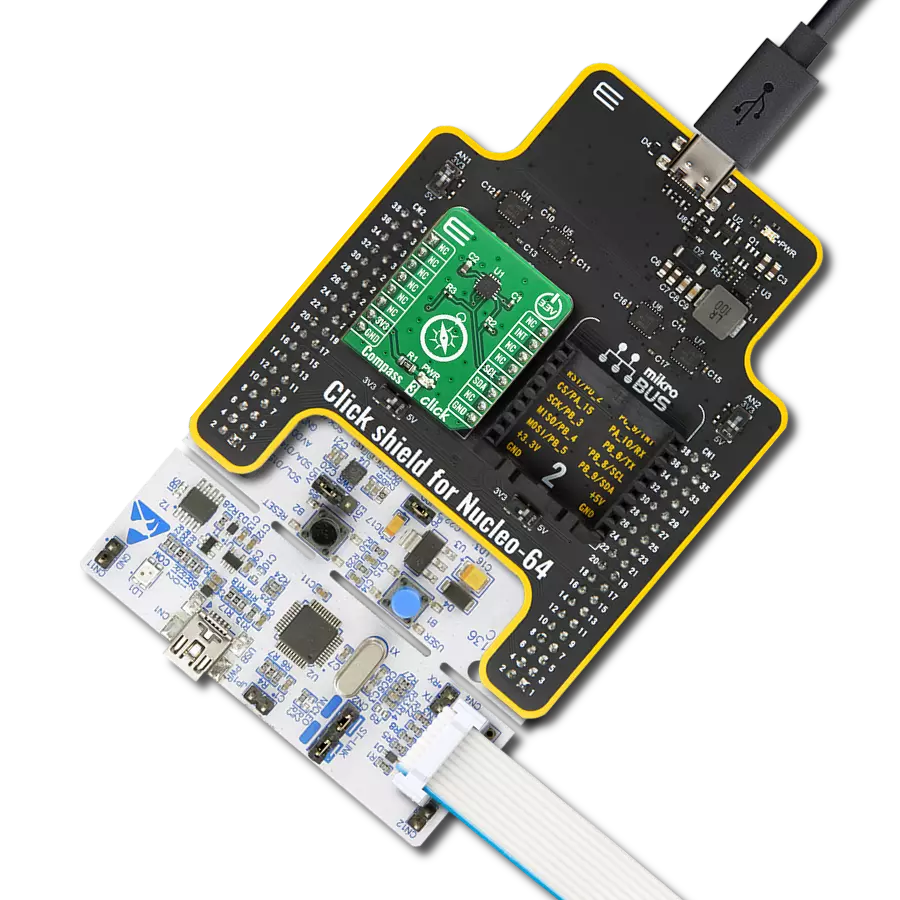
Start by selecting your development board and Click board™. Begin with the Curiosity Nano with PIC18F57Q43 as your development board.


Software Support
Library Description
This library contains API for Gaussmeter Click driver.
Key functions:
gaussmeter_write_reg- This function writes 16-bit data to the specified register addressgaussmeter_get_data- This function reads the temperature and axis data from the chipgaussmeter_digital_read_int- This function reads the digital input signal from the INT pin.
Open Source
Code example
The complete application code and a ready-to-use project are available through the NECTO Studio Package Manager for direct installation in the NECTO Studio. The application code can also be found on the MIKROE GitHub account.
/*!
 * \file
 * \brief Gaussmeter Click example
 *
 * # Description
 * This example showcases how to configure and use the Gaussmeter Click. This Click measures
 * magnetic fields around the device using a 3 axis measurement system. Alongside the magnetometer,
 * the Click contains an integrated temperature sensor which provides data for the thermal compensation.
 *
 * The demo application is composed of two sections :
 *
 * ## Application Init
 * This function initializes and configures the Click and logger modules.
 * Additional configuring is done in the default_cfg(...) function.
 *
 * ## Application Task
 * This function reads data from the magnetometer and the temperature sensor and displays that
 * data using the UART console every 400 milliseconds.
 *
 * \author MikroE Team
 *
 */
// ------------------------------------------------------------------- INCLUDES

#include "board.h"
#include "log.h"
#include "gaussmeter.h"

// ------------------------------------------------------------------ VARIABLES

static gaussmeter_t gaussmeter;
static log_t logger;
static uint8_t buf_idx;

// ------------------------------------------------------ APPLICATION FUNCTIONS

void application_init ( )
{
    log_cfg_t log_cfg;
    gaussmeter_cfg_t cfg;

    /**
     * Logger initialization.
     * Default baud rate: 115200
     * Default log level: LOG_LEVEL_DEBUG
     * @note If USB_UART_RX and USB_UART_TX
     * are defined as HAL_PIN_NC, you will
     * need to define them manually for log to work.
     * See @b LOG_MAP_USB_UART macro definition for detailed explanation.
     */
    LOG_MAP_USB_UART( log_cfg );
    log_init( &logger, &log_cfg );
    log_info( &logger, "---- Application Init ----" );

    //  Click initialization.

    gaussmeter_cfg_setup( &cfg );
    GAUSSMETER_MAP_MIKROBUS( cfg, MIKROBUS_1 );
    gaussmeter_init( &gaussmeter, &cfg );
    Delay_ms ( 100 );
    gaussmeter_default_cfg( &gaussmeter );
    Delay_ms ( 500 );
}

void application_task ( )
{
    float temp_buf[ 4 ] = { 0 };
    uint8_t error_bit;
    uint8_t axis_check;
    uint8_t cnt;

    error_bit = gaussmeter_get_data( &gaussmeter, temp_buf );

    if ( !error_bit )
    {
        axis_check = 1;
        buf_idx = 0;
    }

    for ( cnt = 0; cnt < 4; cnt++ )
    {
        switch ( gaussmeter.aux.command_byte_low & axis_check )
        {
            case 1:
            {
                log_printf( &logger, " * Temperature: %.2f C\r\n", temp_buf[ buf_idx++ ] );
                break;
            }
            case 2:
            {
                log_printf( &logger, " * X-axis: %.2f microT\r\n", temp_buf[ buf_idx++ ] );
                break;
            }
            case 4:
            {
                log_printf( &logger, " * Y-axis: %.2f microT\r\n", temp_buf[ buf_idx++ ] );
                break;
            }
            case 8:
            {
                log_printf( &logger, " * Z-axis: %.2f microT\r\n", temp_buf[ buf_idx++ ] );
            }
        }
        axis_check <<= 1;
    }
    log_printf( &logger, "----------------------------------\r\n" );
    Delay_ms ( 400 );
}

int main ( void )
{
    /* Do not remove this line or clock might not be set correctly. */
    #ifdef PREINIT_SUPPORTED
    preinit();
    #endif

    application_init( );

    for ( ; ; )
    {
        application_task( );
    }

    return 0;
}

// ------------------------------------------------------------------------ END
Additional Support
Resources
Category:Magnetic